
Device description
Introduction
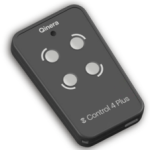
This remote control allows you to easily control different devices in your environment. Once programmed, you can activate each of its functions by directly pressing its keys.
What devices can be controlled with this remote?
The Control 4 Plus can control up to 7 elements in your environment. This includes:
- All Qinera Enabler receivers. These control common household elements like lights, blinds, alarms, doors, furniture, beds, etc.. For these, the remote uses Radio Frequency (RF) signals, so the receiver can be activated without direct visibility.
- All household devices that work with a remote control, such as stereos, televisions, DVD players, etc.. For equipment using Infrared (IR), there must be direct visibility between the remote and the receiver, just like with the original remote.
- Additionally, this remote is compatible with GewaLink and KNX systems.
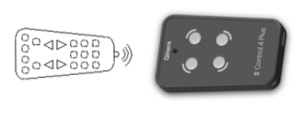
What parts make up the remote?
The device is composed of:
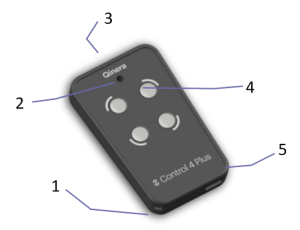
- Hook for hanging.
- Battery LED.
- Infrared Viewer.
- Ergonomic Keypad.
- Input for battery charging and programming (USB Type C 2.0).
Programming from the Remote
The functions of each key for remote programming are:
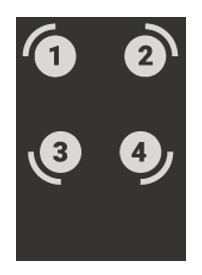
1: First digit of the code to program. 2: Record code.
3: Second digit of the code to program.
4: Third digit of the code to program.
To program a button on the remote, follow these steps:
A. Select the programming mode:
Step 1.
Press and hold the button you want to program (the battery LED will light up red).
Step 2.
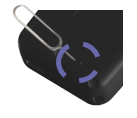
Without releasing it, press and release the programming button on the back of the remote, using a fine-tipped object. The LED will change from red to green.
Step 3.
Release the button from step 1. The LED will change to orange, indicating the remote is ready to enter the code.
B. Enter the code to program:
Step 4:
Use the designated keys (1, 3, 4) to enter the three digits of the code.
- Button (1): Press this button as many times as the value of the first digit of the code to be programmed.
- Button (3): Press this button as many times as the value of the second digit of the code to be programmed.
- Button (4): Press this button as many times as the value of the tirth digit of the code to be programmed.
Example, to program code 160:
Press button (1) one time;
Press button (3) six times;
Press button (4) zero times (do not press);
Each time a button is pressed, the battery LED will change from orange to green.
C. Finalize the recording to the desired scene:
Step 5:
Record the entered code in one of the two scenes:
- To record in Scene 1: Press and release button (2).
- To record in Scene 2: Press and hold button (2) until the green led lights up.
Once finished, the LED will blink green several times and then turn off.
Programming for Infrared (IR) Functions (copying other remotes)
NOTA: Lea previamente el apartado de “Programación básica desde el mando” antes de seguir con este apartado.
Si desea copiar un botón de un mando a distancia existente (p.ej., de una TV), debe seguir los pasos generarles de programación teniendo en cuenta que el código para copiar otro mando es el 000.
- Press and hold the button you want to program (the battery LED will light up red).
- Without releasing it, press and release the programming button on the back of the remote, using a fine-tipped object. The LED will change from red to green.
- Release the button from step 1. The LED will change to orange, indicating the remote is ready to enter the code.
- Since the code is 000, you do not press buttons 1, 3, or 4
- Press button (2) depending on the scene (the LED will light up red).
- Bring the remote to be copied closer, orient it towards the Infrared Viewer, and press the button you want to copy
The LED will turn off when the code has been recorded.
NOTE: It’s not necessary to hold down the remote to be copied, a normal press is sufficient.
IMPORTANT NOTE: During IR programming, ensure no surrounding elements are generating an infrared signal (laptops, phones, certain lighting) as this could cause interference.