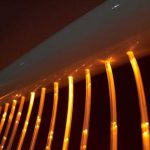
- Products
- >
- Lighting
- >
- Luminea Led Line
Safety warning
- It’s highly recommended to read this manual before start using the device.
- The product should be always used under adult supervision
- DO NOT cover the ventilation slots.
- To avoid sight damage, do not look directly at light source.
- This product is designed for indoor use only.
- People prone to epileptic seizures should consider the effects of these lights can have on them.
- Be careful with the cables of the product. If you detect any defect in cable, disconnect the power supply immediately and contact our technical support department.
- This product is designed to create a visual and sensitive effect; it should never be shaken, tipped or hit with hard objects.
Technical specifications
- Power supply:
- 230V (AC) – 24V (DC)
- Power: 70W
- Dimensions: 110x60x40 mm
- Controller:
- DMX RGB 5V-24V 11W
- Dimensions: 125x65x45 mm
- DMX cable length: 6m
- RGB line:
- 350 lm/m
- 24V
- 12W/m
- 60pcs/m
- 5m
- IP54
Description
Introduction
LED strip lights allow you to create colored environments by changing the color of the entire room. This way, you can increase the impact of the projections and the colors of the room’s therapeutic elements. Installing LED strip lights behind the protective panels provides an ambient lighting effect that is perfectly integrated into the room’s furniture and follows the edges of the paneled walls.
LED technology for reduced power consumption and longer life.
Our Luminea Led Led can be used along with a 6 button, giant die, the switch that you want, or even with the Luminea App (available for downloading) to control the colours in a unique way.
Luminea Led Line can also be part of the SHX System as part of a more complete multisensory environment.
Components
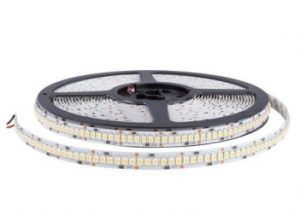
5m LED line
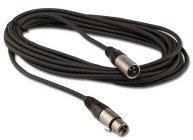
6m DMX cable
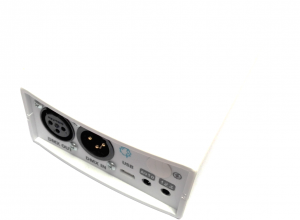
Luminea led line controller
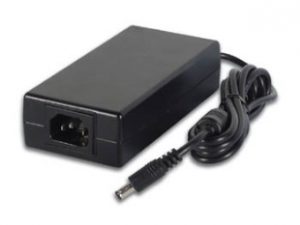
24V Power supply (100W)
Aluminium profile and translucent top *
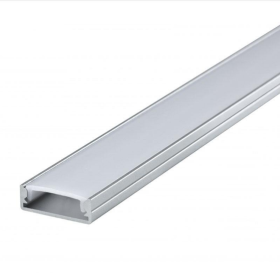
(5m for 1 5m line /10m for 2 5m line)
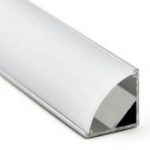
* 45º profile when the instalation es in false ceiling
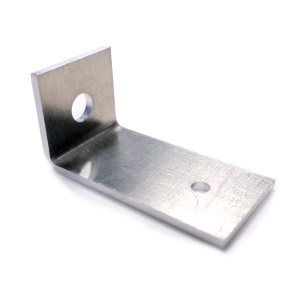
Fastening for Aluminium profile
For false ceiling
For ceiling
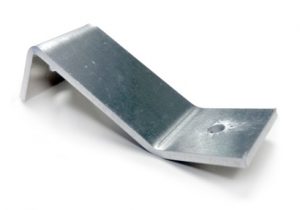
For wall
Pre-Installation
- A 230V socket must be provided for the power supply of the device.
- A DMX connection must be provided for lighting control (female DMX connector).
- In case of need to control more lighting elements, a second DMX connection must be provided to ensure continuity to the signal (male DMX connector).
Installation
Profiles assembly:
Necessary elements for assembly:
For the assembly of the parts of the fixing of the profile the parts are not included with the product:
- 1x flat head screw M3 x 10mm
- 1x self-locking M3 nut
- 1x fixing wall (6mm). Make sure that the plugs are suitable for the mounting surface.
- 1x screw with cylindrical head
Fix the mounting parts (depending on the type of surface) to the aluminum profile.
The placement of this device must be on the wall or ceiling taking the staples that are included which can be screwed to any surface.
It is recommended to separate to put the pieces of fixation of the profile separated 1 meter.
To fix the pieces:
- Make a 3mm hole in the profile.
- Countersink the profile on the inside so that the screw head is flush.
- Fix the two elements with the nut.
- Mount the profile on the ceiling or wall.
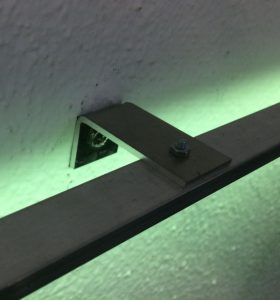 Profile mounting with wall support
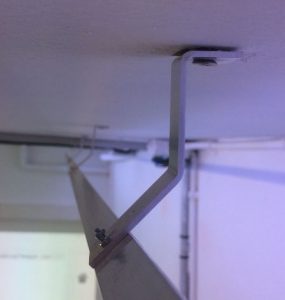 Profile mounting with ceiling support
Fixing the led strip:
- Remove the adhesive protector from the led line and stick the led strip to the profile.
- Place the diffuser on the aluminum profile to cover it.
Connection
DMX bus installation
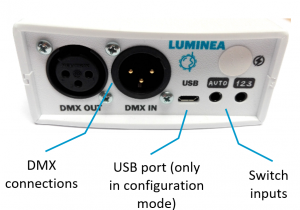
- Make the DMX connections: for use with the SHX system, the DMX cable must be connected to the DMX IN connector. This cable must be connected to the rest of the DMX bus of the installation. In the event that this element is the last of the entire installation, the bus terminator should be connected to the DMX OUT (this terminator is supplied in the SHX Central Device).
If you must continue the DMX signal to another device, you must connect the DMX cable to the DMX out connector.
LEDs strip connection
Follow the attached diagram taking into account minimize the distance between the LED line and the Luminea controller. It may be necessary to extend the interconnection wiring between the LED line and the controller, in this case, always bear in mind that the cable section is suitable for the type of installation.
Connect the 4 wires of the led strip as shown in the figure:

R= red wire
G= green wire
B= blue wire
V+ = black wire (common)
Power connection:
Connect the feeder output to the power terminal as shown in the figure:

+ : positive wire
– : negative wire
IMPORTANT: the polarity of the feed is important. Follow the polarity indications of the connector.
How to use
Before start using the device check the following points:
Connect the power adapter to the main.
Once you’ve plugged the light source, it will stay lit for 10 seconds (a white light) and thereafter it will work in automatic mode (see next section).
Use with switches
 This input switches the device on and off. When it is switched on, the lighting will change automatically.
 This input changes the lighting colour cyclically, transitioning through red, green, yellow, blue, orange, white and off.
Use with wireless controllers
This device can be controlled with the wireless Button 6 controller or SHX Die.
Programme the Button 6 controller to work on the device setting to change the colour of the lighting directly from this wireless controller.
You can also turn the device on and off from the wireless controller.
Control with an Android tablet
Use the Luminea app to control the device directly from an Android tablet.
Follow these steps:
Link the device to the tablet.
Select the lighting device from the list that appears in the app.
Use the activities and features in the app to control the lighting device.
Refer to the help section in the app for information on how to use it.
SHX use
- In the SHX software you can control the lights of the device.
- In the SHX app, you will also find a tab that allows you to change the colors of the device: you can choose between different colors or activate the function of automatic color changes.
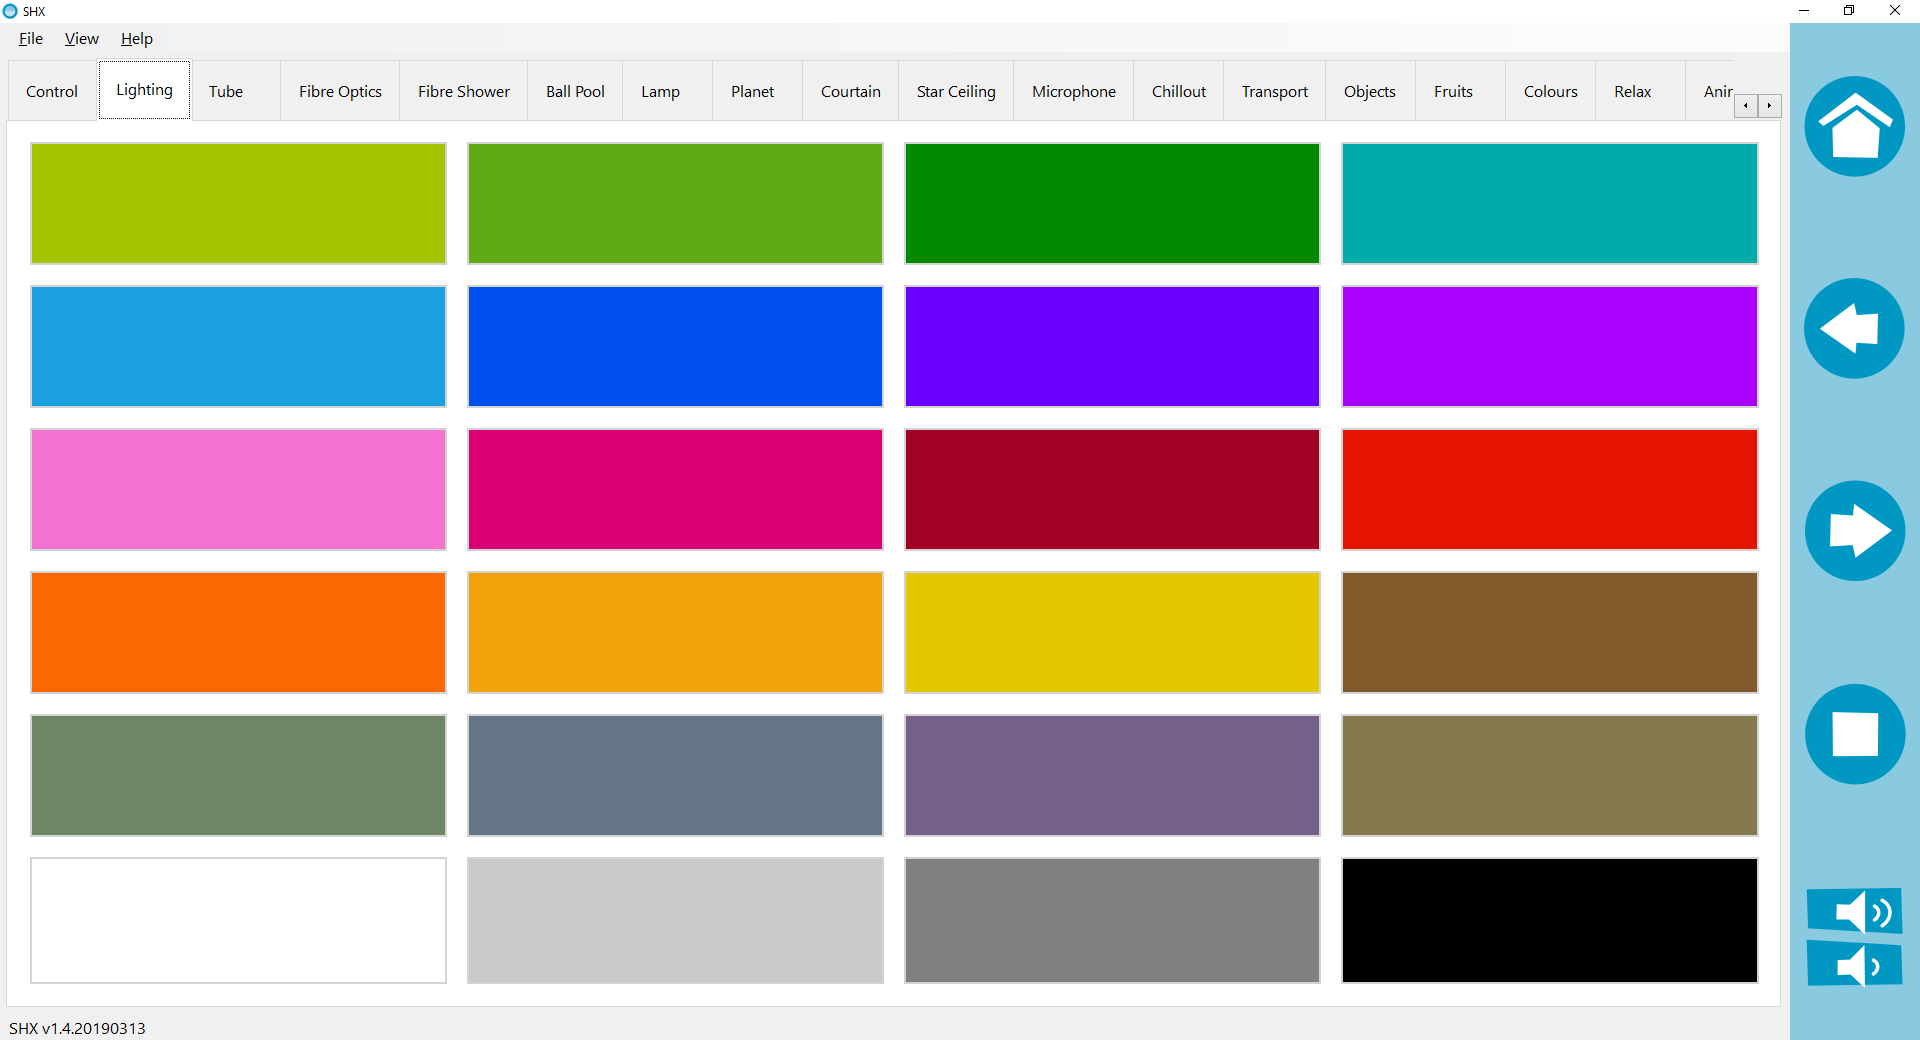
- In the SHX application there’s a power off button, you can turn off the device with it.
- You can configure the different contents of the SHX application as well, to create the effects you want to associate with that content. See the manual of the SHX application to learn how to create these contents, (automatic mode, according to the SHX scenes, by sound, simultaneous with the other elements or independent)
Software configuration
The control of this device has been added to the SHX application.
The configuration parameters for this device are:
Lighting control:
- DMX address: 001
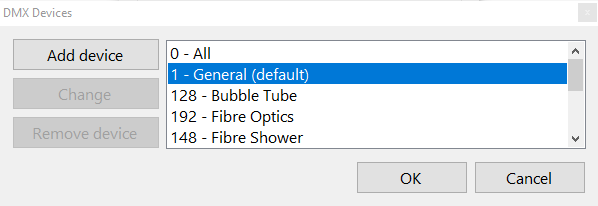
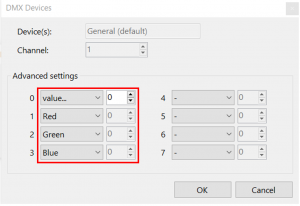
In the SHX application it has been created within the DMX devices with the following configuration:
Maintenance
- Disconnect the device from the electrical power before cleaning.
- Use a soft cloth moistened in soapy water to clean the product.
- Do not use abrasive products.
- Dry the product before connecting back to the wall socket.
- Do not connect the device if liquid has entered inside
- Don’t cover the ventilation of the lightsource, and keep them clean to avoid overheating
Troubleshooting
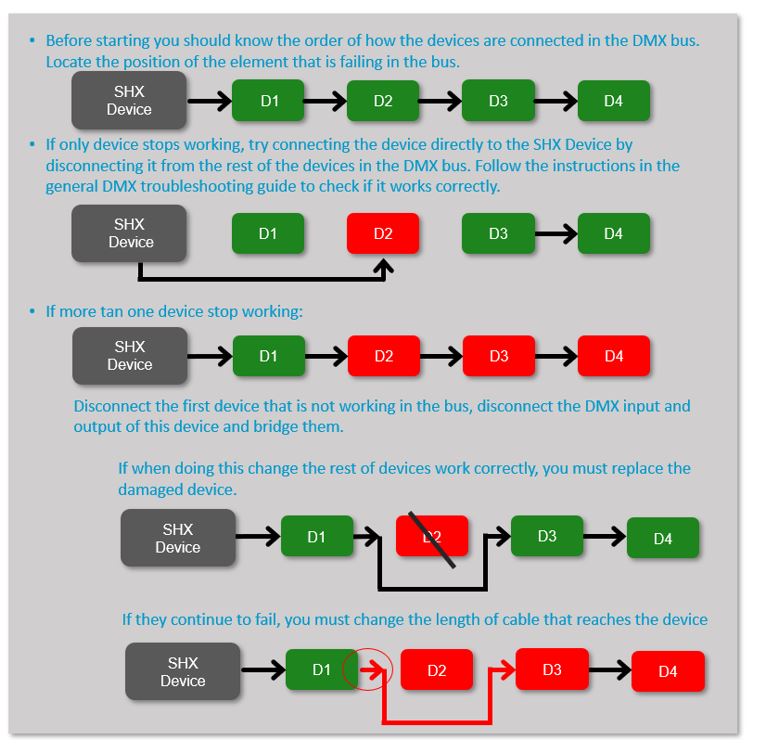
- For a basic troubleshooting of DMX devices follow the next steps:
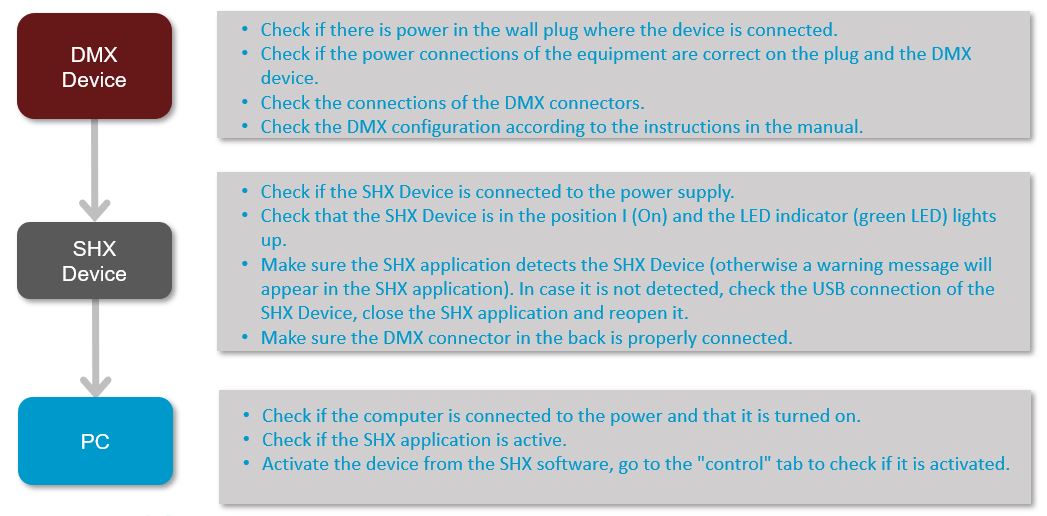
- When a DMX device is affecting the well functioning of other devices on the DMX bus, follow the next steps to identify wheater if a device is faulty or the issue is related to the cable used to connect all the devices.
Recycling
- To avoid any possible damage to the environment or human health caused by uncontrolled disposal of waste, separate these products from other types of waste and recycle them correctly.
Private users can contact the establishment where they purchased the product or with the their local authorities to find out how and where they can safely recycle it.
Warranty
Within the legal warranty period we agree to rectify for free by repairing or replacing defects in the product derived from defective materials or manufacturing defects.
Any unauthorised alteration or modifications to the product will void this warranty.
Product conformity
This product complies with 2014/30/EU Directive requirements.
Declaration of conformity can be downloaded by clicking on the following link: bjliveat.com
Customer service
If you find any damage or any material is missing please contact our technical service for assistance.
Qinera
c/ Pacífic 51
08027 Barcelona, Spain
Phone: +34 93 285 04 37
Fax: +34 93 553 56 34
e-Mail: info@qinera.com
web: http://www.qinera.com
Any damage or breakage caused during transport must be notified within three days of receipt.


