- Products
- >
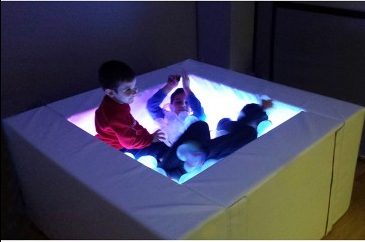
- SHX ball pool
Safety warning
- It’s highly recommended to read this manual before start using the device.
- The product should be always used under adult supervision
- DO NOT cover the ventilation slots.
- To avoid sight damage, do not look directly at light source.
- This product is designed for indoor use only.
- People prone to epileptic seizures should consider the effects of these lights can have on them.
- Be careful with the cables of the product. If you detect any defect in cable, disconnect the power supply immediately and contact our technical support department.
- This product is designed to create a visual and sensitive effect; it should never be shaken, tipped or hit with hard objects.
Technical specifications
- Feeder ……………………………………..100-230V(AC) 50Hz 1.8A – 12Vdc (6A)
- Mesures ………………………………….. 145x145x70cm
- DMX cable length …………………….. 6m
Vibrator (only for Vibroacustic version).
- Impedance ……………………………….. 16 ohms
- Max power ……………………………….. 100W
- Continuous power ……………………… 50W AES
- Max frequency ………………………….. 120 Hz
- Cable length …………………………….. 15 metros
- cable connector …………………………. Male Speakon
Material:
- Microbial tested resistance.
- Bacterial tested resistance.
- Fungal tested resistance.
- Abrasion tested resistance.
- Perspiration and human saliva tested resistance.
- Urine tested resistance.
- Blood tested resistance.
- Total weight: 620 g/m2
- Thickness: 0.5 mm to 1 mm.
- Fireproof material classification m2.
- Complies with EN71-3 Toy Safety.
- Excellent resistance to sun exposure
Description
Introduction
Ball pits are a fun therapeutic element that encourage movement and play. The massaging effect of the balls also encourages proprioception.
Illuminated ball pits consist of transparent balls that allow colored light to pass through them and be projected from inside the pit, creating an incredible light effect that boosts interaction.
The ball pit colors change at the same time as the rest of the room thanks to the SHX System: you can select a color by means of any SHX controller (remote control, tablet, die, touchscreen panel, button…), or allow the color to change depending on voice signals or the images being projected.
Componentes de la piscina de bolas luz y vibración
Ball pool
See-through ball bag

Power supply 12V/5A:
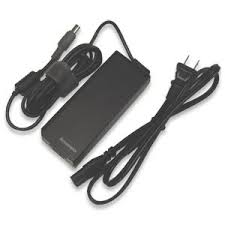
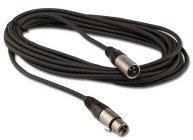
DMX Cable:
Vibration cable (vibroacustic version only).
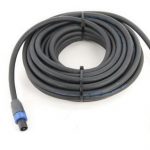
Pre-Installation
- A 230V socket must be provided for the power supply of the device.
- A DMX connection must be provided for lighting control (female DMX connector).
- In case of need to control more lighting elements, a second DMX connection must be provided to ensure continuity to the signal (male DMX connector).
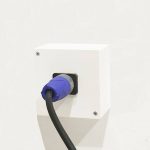
- For the vibroacoustic version the vibroacoustic cable must be brought to the vibration amplifier. If desired, a socket with a female Speak on connector near the pool can be provided:
Installation
Unpack the 5 foam blocks that make up the ball pool. There will be 2 long blocks, two shorts and a square platform. One of the 2 short blocks has two wires that rises on both sides of the block, These cables interconnect the LED bars and supply power to the system. The square platform has a cable with a speakon connector that corresponds to the vibroacoustic system that has the platform integrated (only in vibroacustic version).
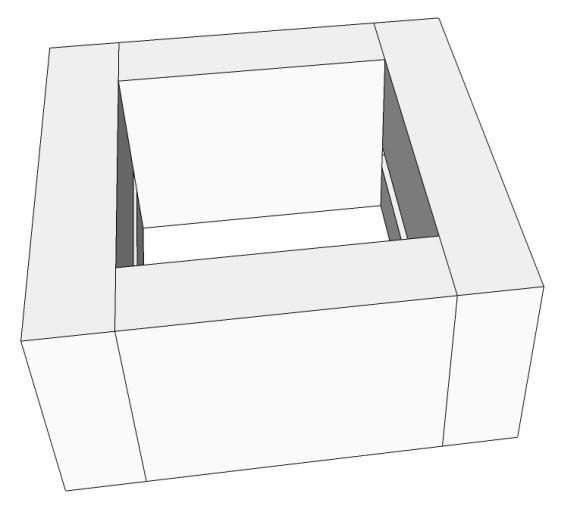
Assembly of the Ball Pool

STEP 1:
Place the platform on the floor, stretching the tabs with the velcros avoiding wrinkles, as shown in the image, taking care to stretch the cable from the vibroacoustic system (unwind the cable completely and remove the end with the connector on one side, do not pull on the cable).
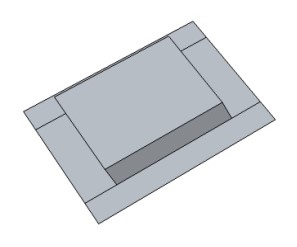
STEP 2:
Place the two short modules each at the opposite end of the platform as shown in the image. Place the module with cables on the right side of the platform.
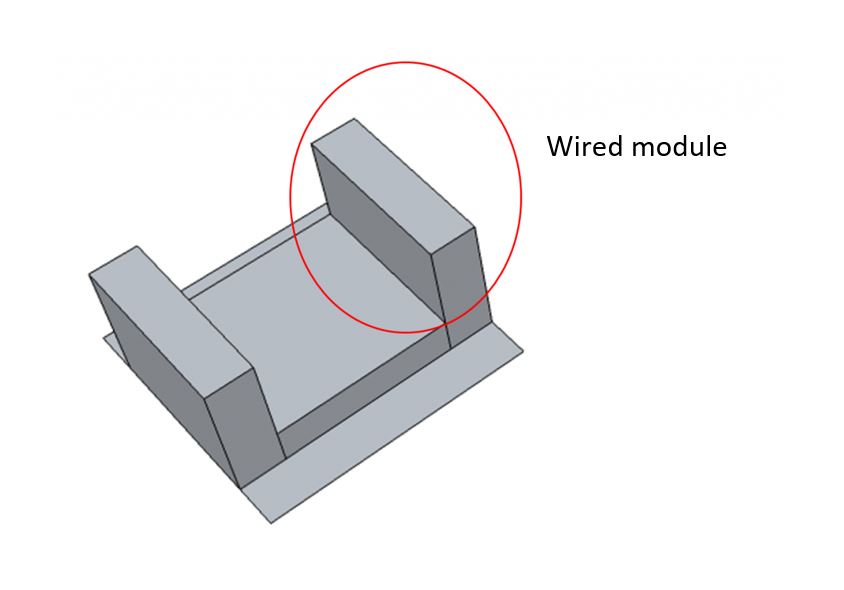
STEP 3:
Place one of the long modules matching the connection cables. Before placing the connection of the data and power cables of the module lightbar completely through the male-female canon connectors that come out of the short module and that they must connect inside the bar through the window that exists in the long module.
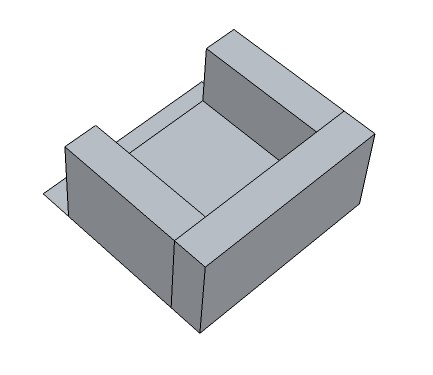
STEP 4:
Place the other long module following the same procedure as in step 3.
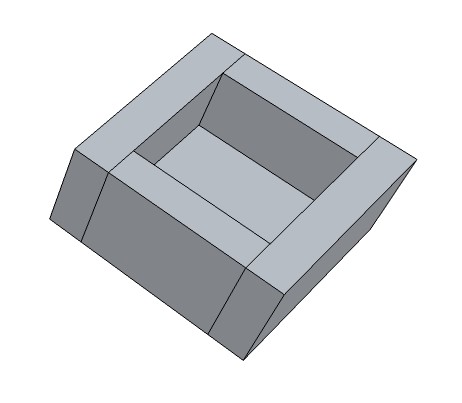
STEP 5:
Connect the power cable to the corresponding connector.
STEP 6:
Make the DMX connections: for use with the SHX system, the DMX cable must be connected to the DMX IN connector. This cable must be connected to the rest of the DMX bus of the installation. In the event that this element is the last of the entire installation, the bus terminator should be connected to the DMX OUT (this terminator is supplied in the SHX Central Device). If you must continue the DMX signal to another device, you must connect the DMX cable to the DMX out connector.
STEP 7:
Fill the pool with the ball bags supplied with the pool to the desired level.
Vibration cable connection:
Connect the connector of the vibration element (depending on the product version) to the vibration amplifier.
To connect the connector you must insert it into the connector and turn it until you feel a “click”:
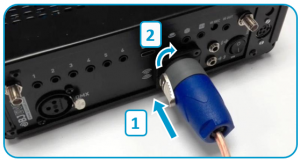
To disconnect the connector, you must pull the silver lever and rotate the connector counterclockwise to remove it.
How to use
Before start using the device
Check the following points:
- The device must be connected to a wall plug.
- The DMX cable must be connected to the device.
- The SHX Central device must be switched on.
Use of the product
- In the SHX software you can control the lights of the device.
- In the SHX app, you will also find a tab that allows you to change the colors of the device: you can choose between different colors or activate the function of automatic color changes.
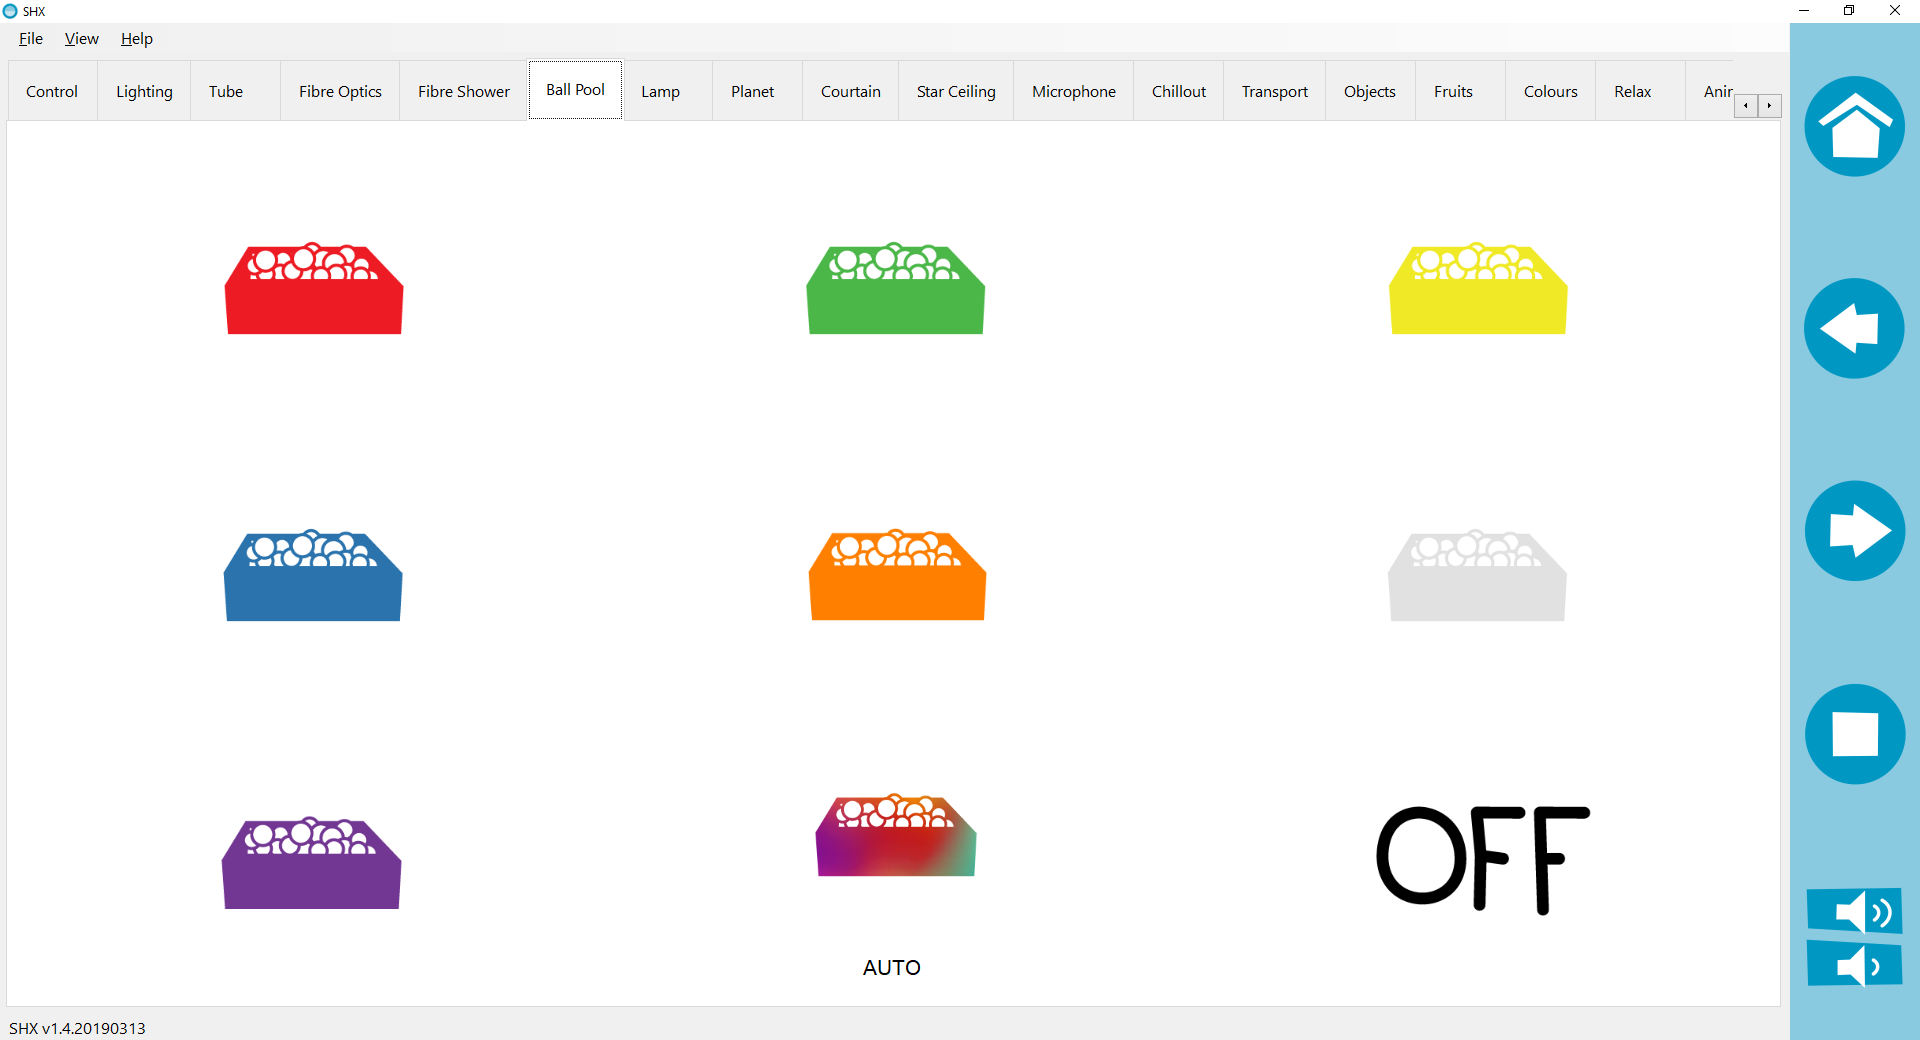
- In the SHX application there’s a power off button, you can turn off the device with it.
- You can configure the different contents of the SHX application as well, to create the effects you want to associate with that content. See the manual of the SHX application to learn how to create these contents, (automatic mode, according to the SHX scenes, by sound, simultaneous with the other elements or independent)
Software configuration
The control of this device has been added to the SHX application.
The configuration parameters for this device are:
Lighting control:
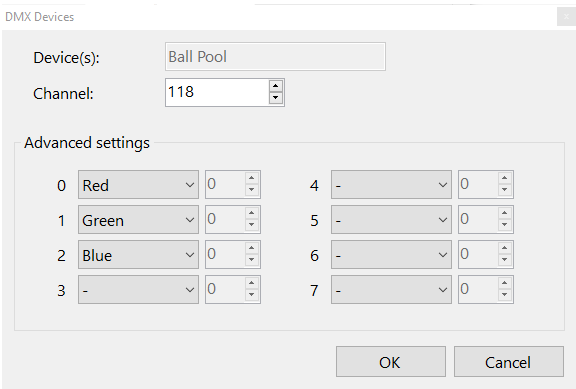
- DMX address: 118
In the SHX application it has been created within the DMX devices with the following configuration:
Maintenance and cleaning
- Disconnect the device from the electrical power before cleaning
- Use a soft cloth moistened in soapy water to clean the product.
- Do not use abrasive products.
- Dry the product before connecting it to the current
- Do not connect the device if liquid has entered inside
- Don’t cover the ventilation of the lightsource, and keep them clean to avoid overheating
Troubleshooting
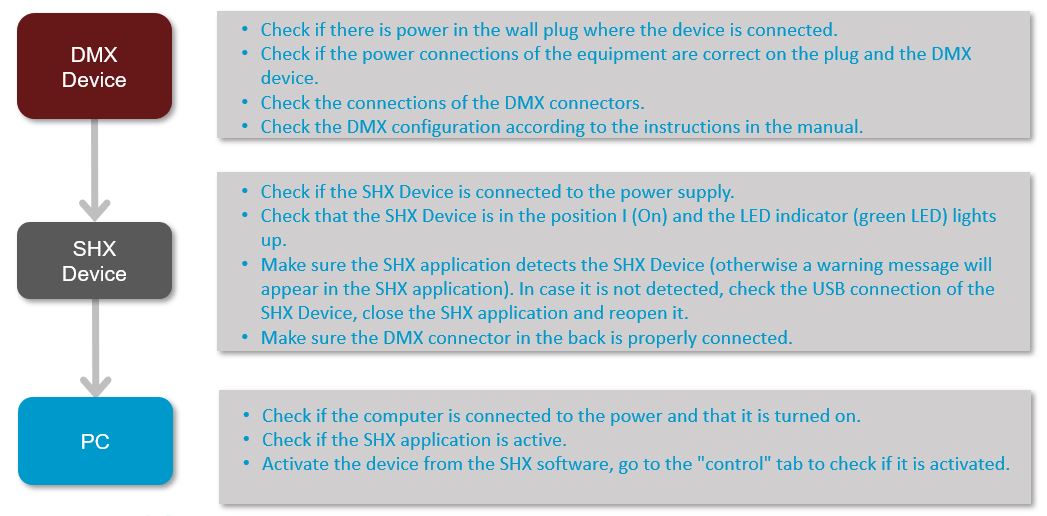
- For a basic troubleshooting of DMX devices follow the next steps:
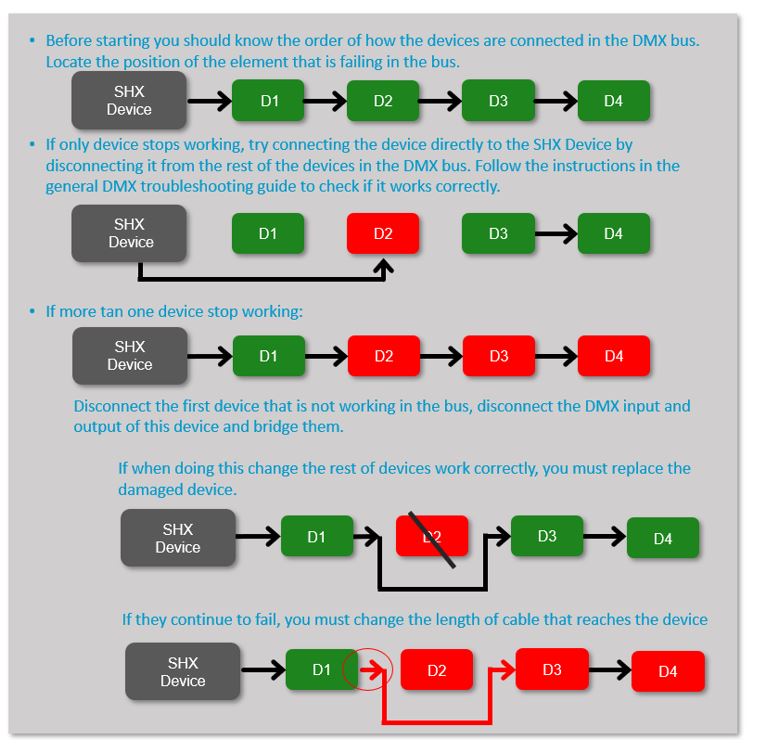
- When a DMX device is affecting the well functioning of other devices on the DMX bus, follow the next steps to identify wheater if a device is faulty or the issue is related to the cable used to connect all the devices.
Recycling
- To avoid possible damage to the environment or human health that represents the uncontrolled disposal of waste, separate these products from other types of waste and recycle them correctly. In this way, the sustainable reuse of material resources is promoted
Private users can contact the establishment where they purchased the product or with the relevant local authorities to find out how and where they can take it to be subjected to environmentally friendly and safe recycling.
Warranty
Within the legal warranty period we agree to rectify for free by repairing or replacing defects in the product derived from defective materials or manufacturing defects.
Any unauthorised alteration or modifications to the product will void this warranty.
Product conformity
This product complies with EU 2004/108/EC Directive requirements .
Declaration of conformity can be downloaded by clicking on the following link: bjliveat.com
Customer service
If you find any damage or any material is missing please contact our technical service for assistance.
BJ Adaptaciones
C/ Mare de Déu del Coll, 70, Bajos
08023 Barcelona, España
Fono: +34 93 285 04 37
Fax: +34 93 553 56 34
e-Mail: info@bjliveat.com
www.bjliveat.com
Any damage or breakage caused during transport must be notified within three days of receipt.


