- Products
- >
- SHX System
- >
- SHX Voice Kit
Safety warning
- It’s highly recommended to read this manual before start using the device.
- Pay attention to all warnings.
- Use the device only for the purposes described in this user manual. The manufacturer will not be responsible for the damages caused by the improper or improper use of the same.
- Use only the accessories specified by the manufacturer.
- Do not spill any liquid on the device. The appliance must be used in dry places and away from water.
- Avoid using the appliance in environments close to heat sources such as flames
discovered, radiators, heating pipes, etc. - Avoid exposure of the device to direct sunlight, dust, intense humidity, rain, vibration or shock.
- Do not block any ventilation holes. Install the device according to these
instructions for use. - Do not open or handle the appliance. Inside it there is no part that can be replaced or repaired by the user. All repairs must be carried out by qualified technicians.
- Use the equipment only with the network adapter supplied by the manufacturer.
- The use of a different network adapter could damage the device.
- Make sure that the power adapter is in good condition and easily accessible, since it is the device’s total disconnect device.
- Protect the power cord to prevent people from stepping on or choking you.
- Immediately interrupt the electrical supply of the device in case of penetration of any solid object or liquid inside. In this case, contact the technical support service.
- Unplug the device during lightning storms.
- If you do not use the equipment for an extended period of time, disconnect the mains adapter from the electrical outlet to disconnect the equipment completely.
- Clean the appliance with a damp cloth, never wet.
- Disconnect the mains adapter before proceeding with cleaning.
- Do not use corrosive or abrasive products as well as alcohols, solvents or detergents
Technical specifications
Frequency ………………………………… 200-230 MHz
Dynamic range………………………….. More than 90dB
Frequency response ……………….. 40Hz – 15KHz – 3dB
Power Supply ………………………………. 12 – 18 Vdc / 4W
N/S ……………………………………………. More than 90dB
Microphone:
Output power ………………………… 8.5mW
Battery ………………………………………. 1.5V × 2 (AA)
Transmitter:
Output power ………………………… 8.5mW
Battery ……………………………………… 1.5V × 2 (AA)
Description
INTRODUCTION:
The SHX voice kit consists of two wireless microphones (one hand-held and one headset) that connect to the SHX Central Device allowing you to modify the room lighting or any element such as a tube, fibre or pool depending on the volume of the voice in four different modes: whites, colours, random and peaks.
In addition it includes two programs that convert the voice signal into light signals displayed on the image projected by the SHX Central Device.
If there is any vibroacoustic element installed in the room, besides the lighting effects it is possible to convert the voice into vibration .
SHX Voice Kit Components:
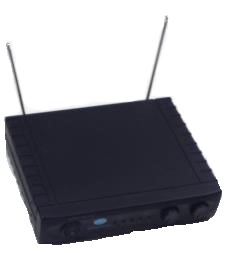 Reciver
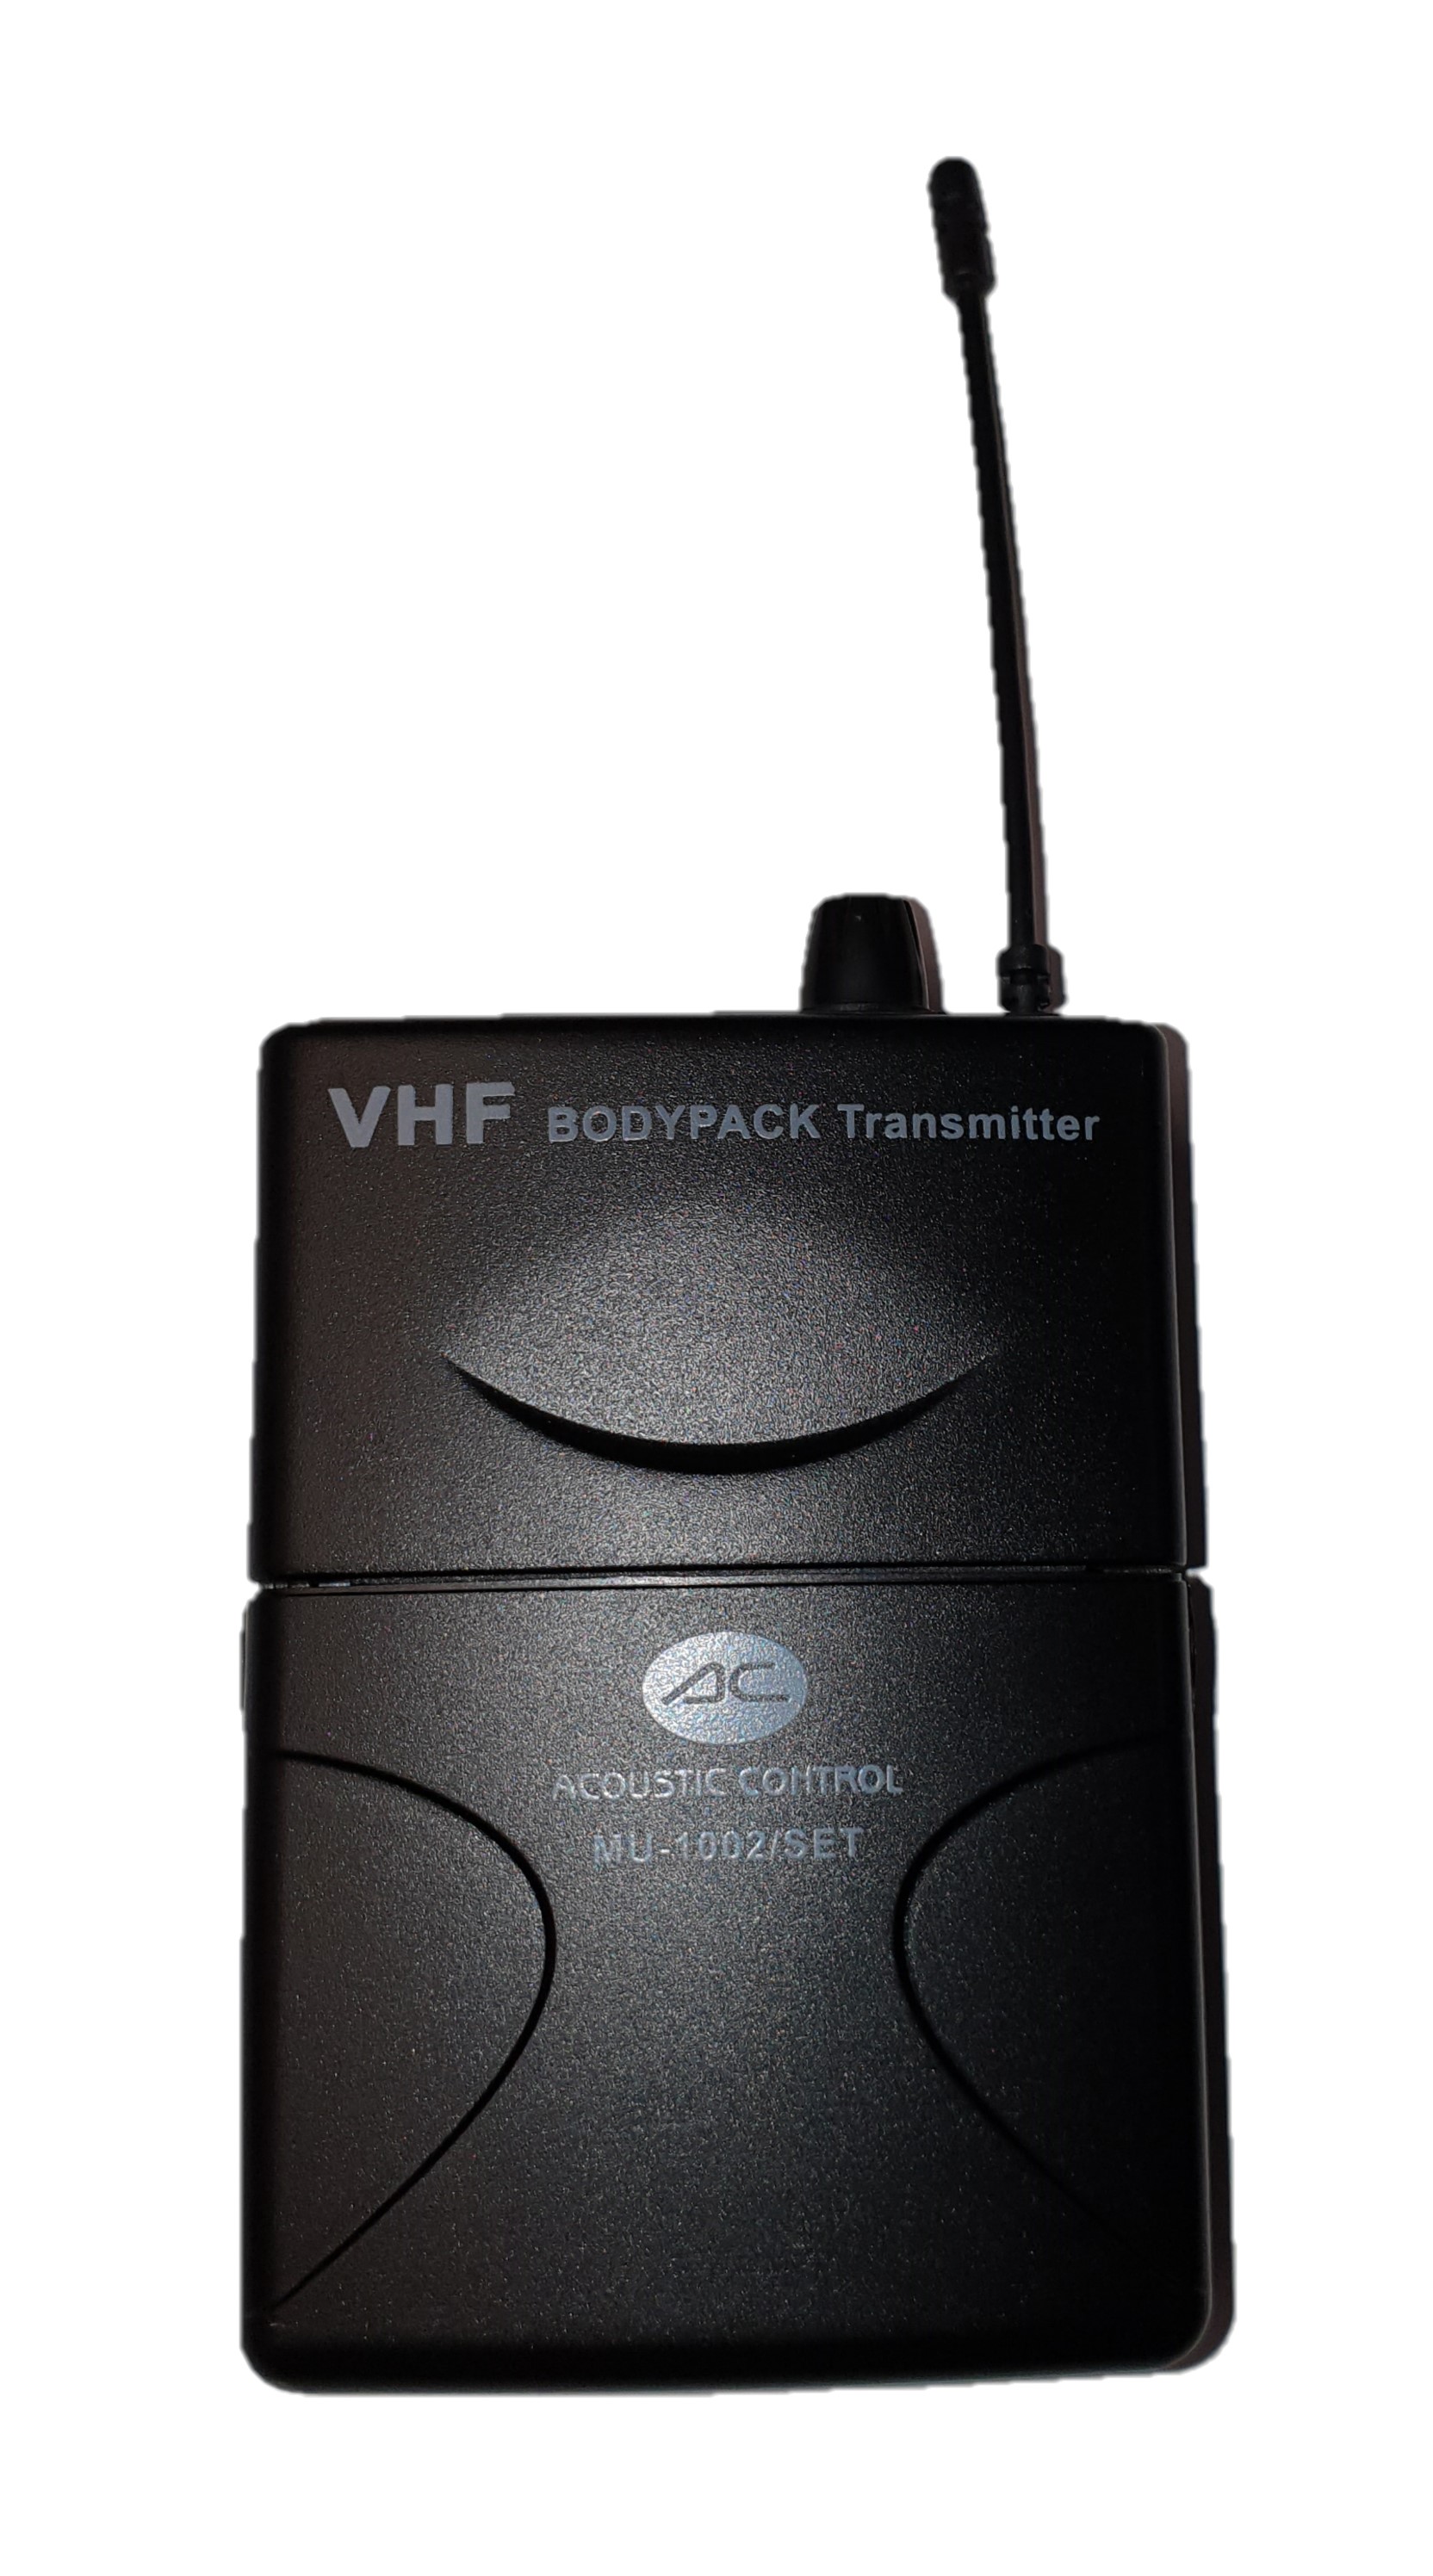 Transmitter
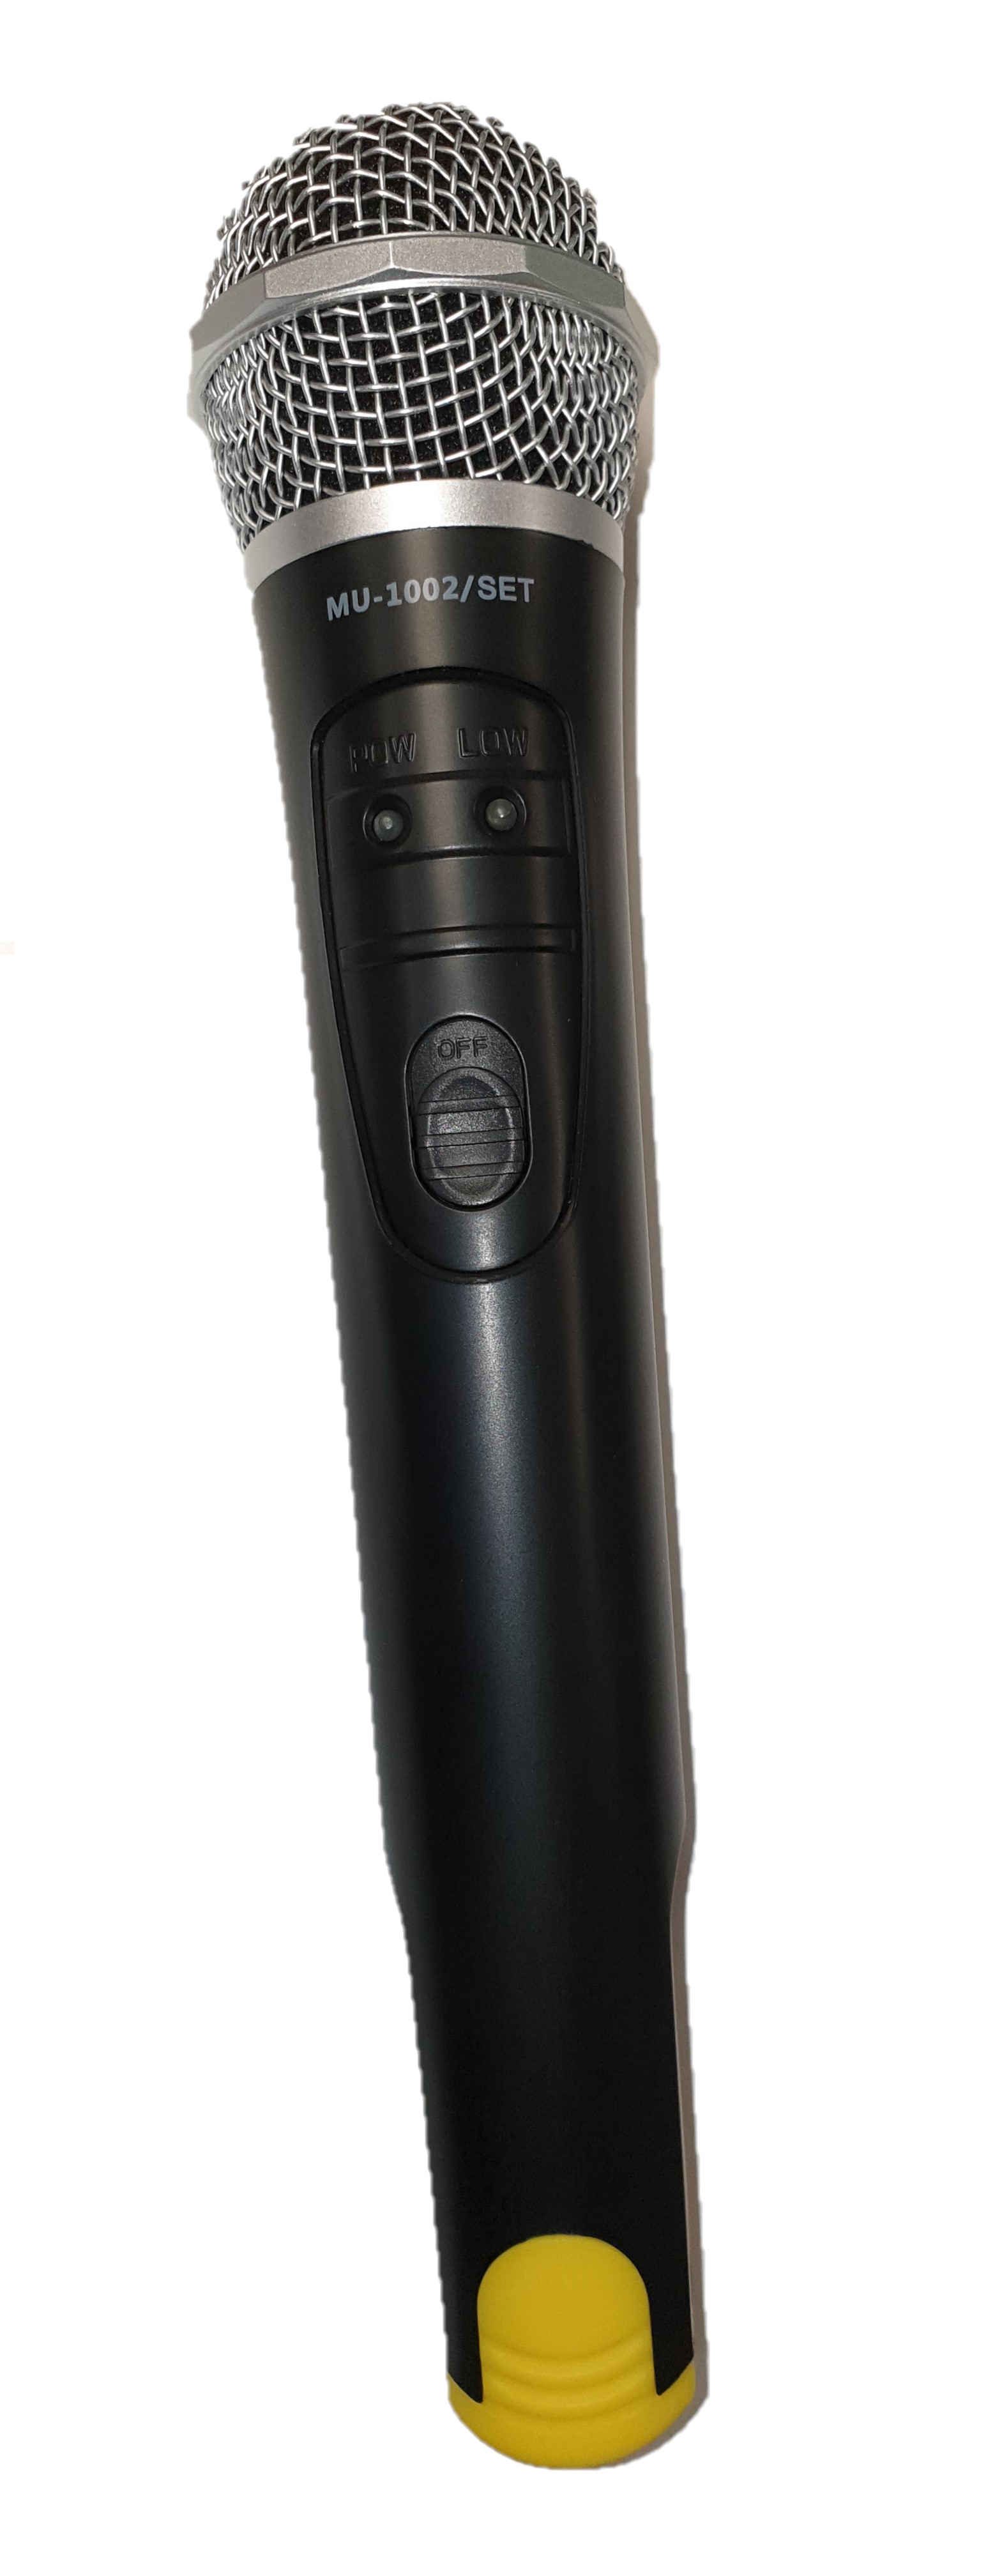 Hand microphone
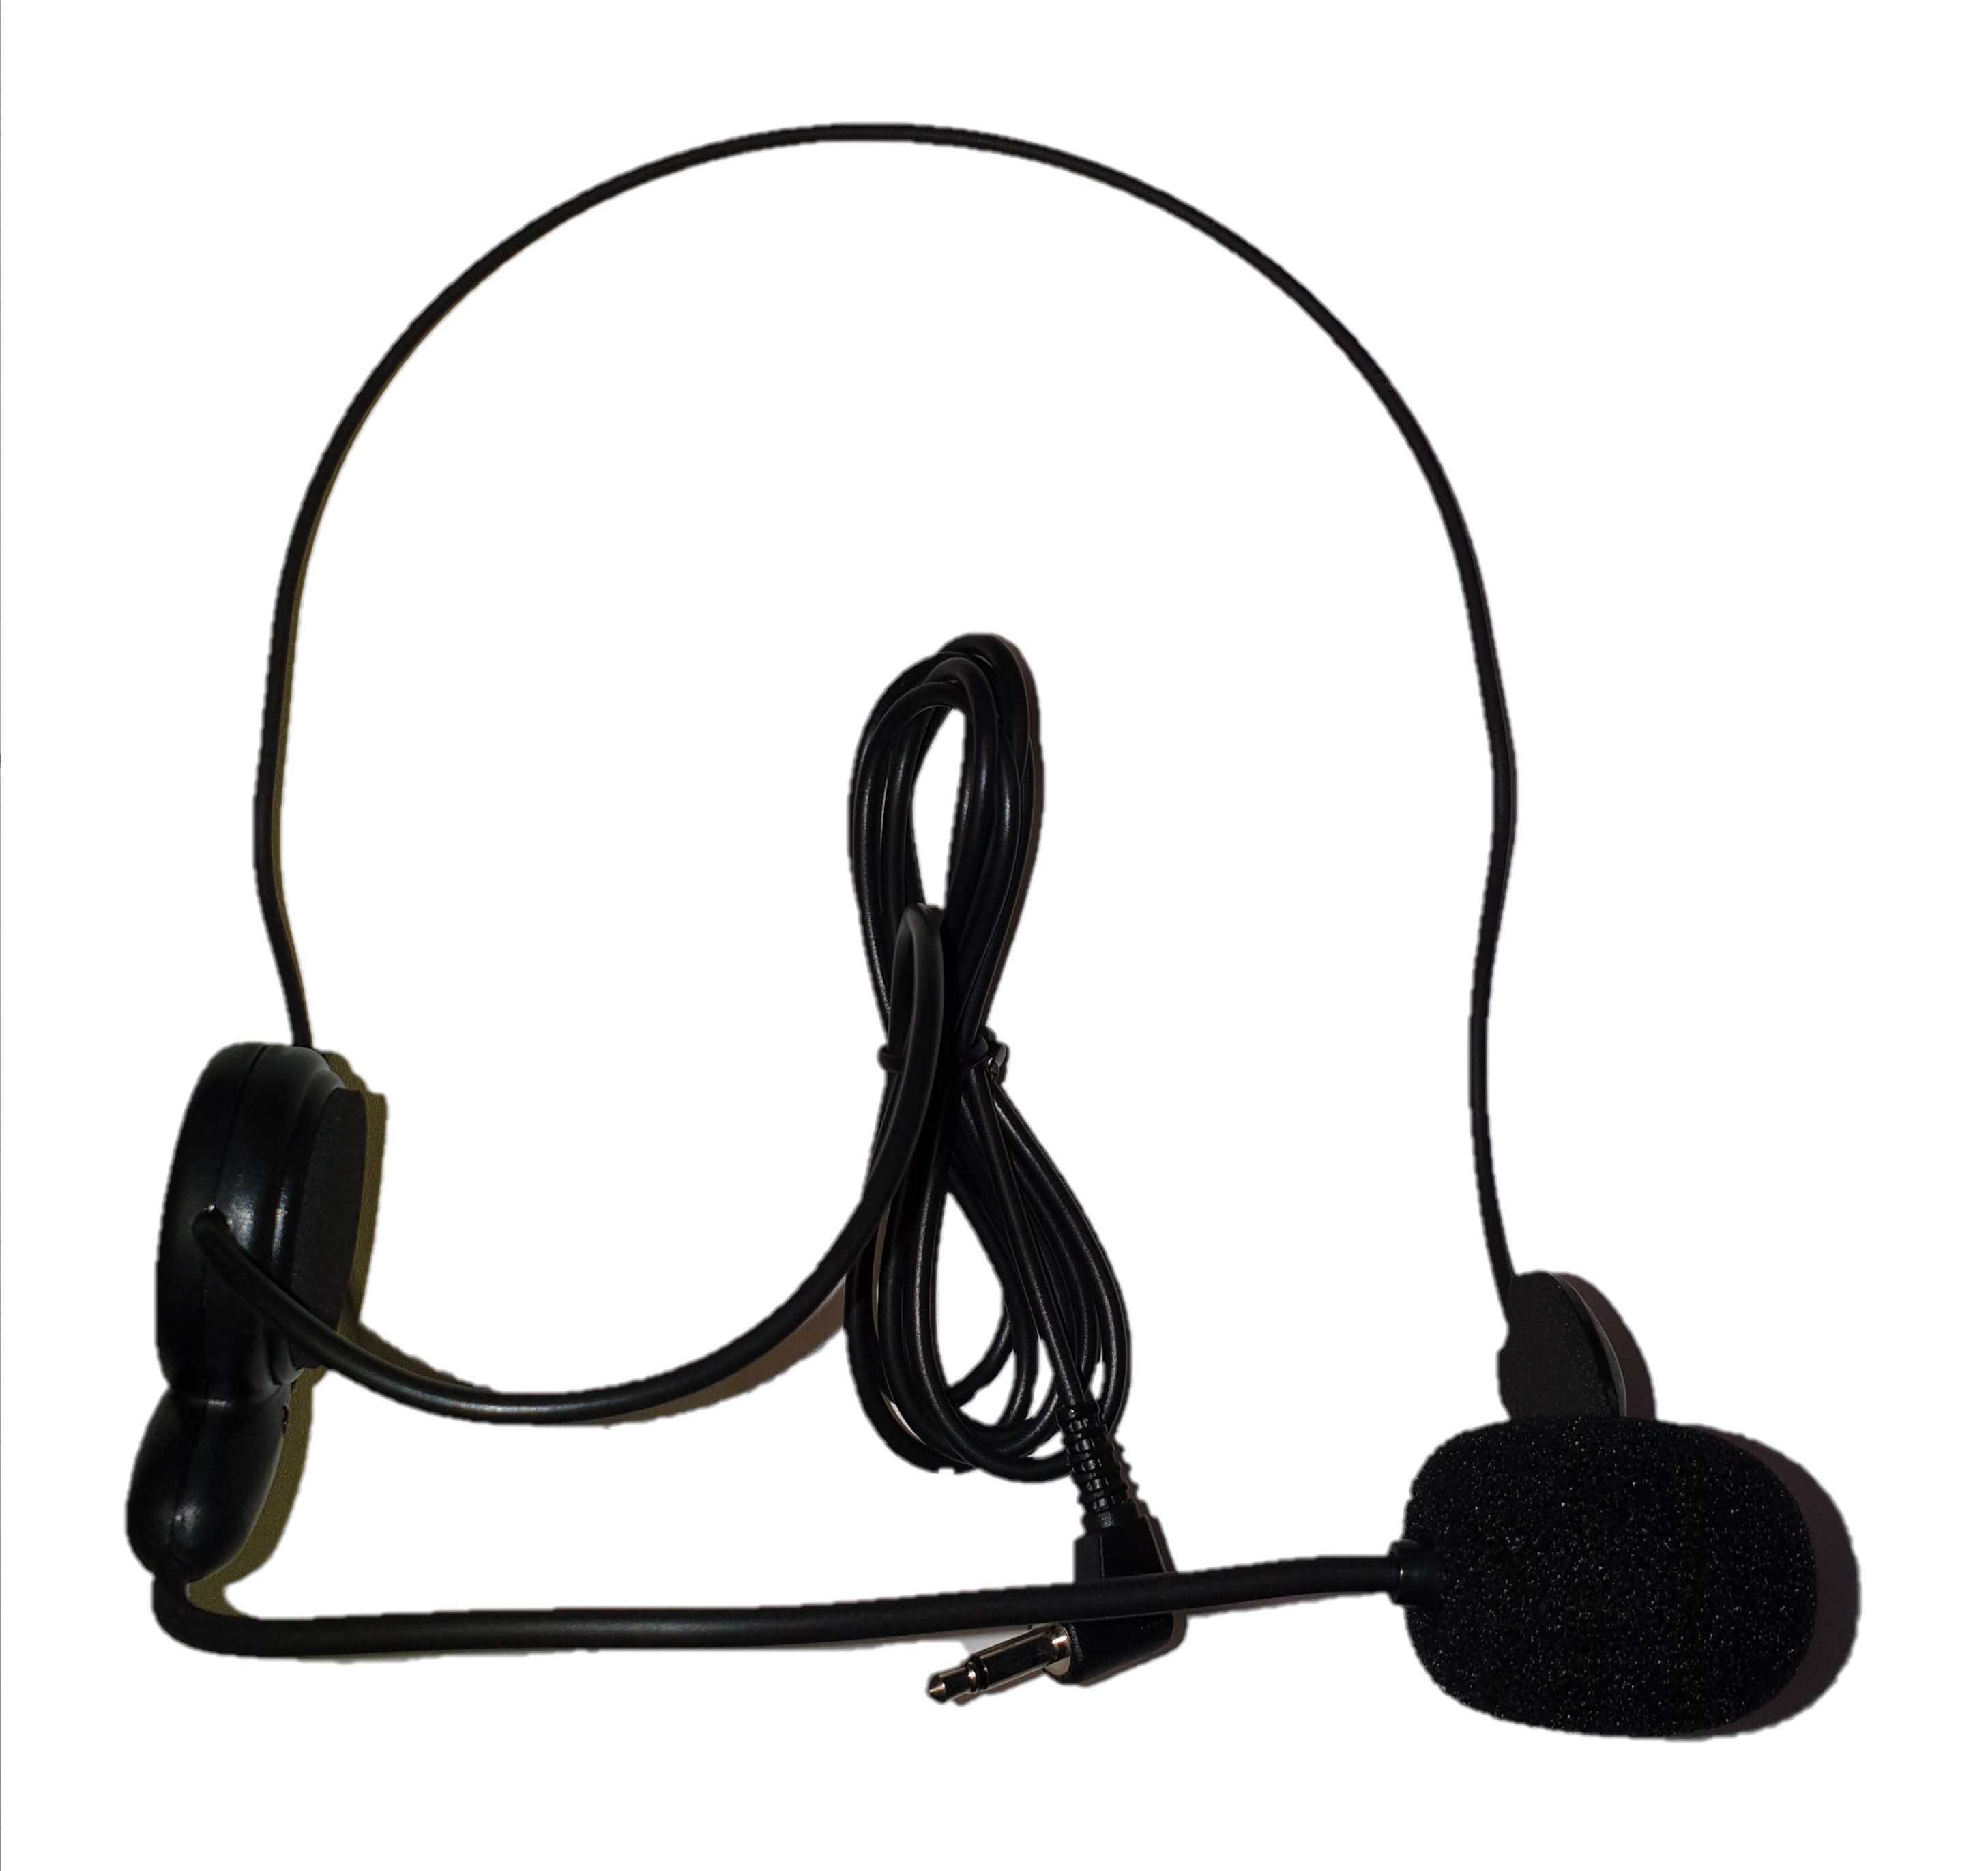 Headset microphone
 Jack cable 6.5 / 3.5 mm
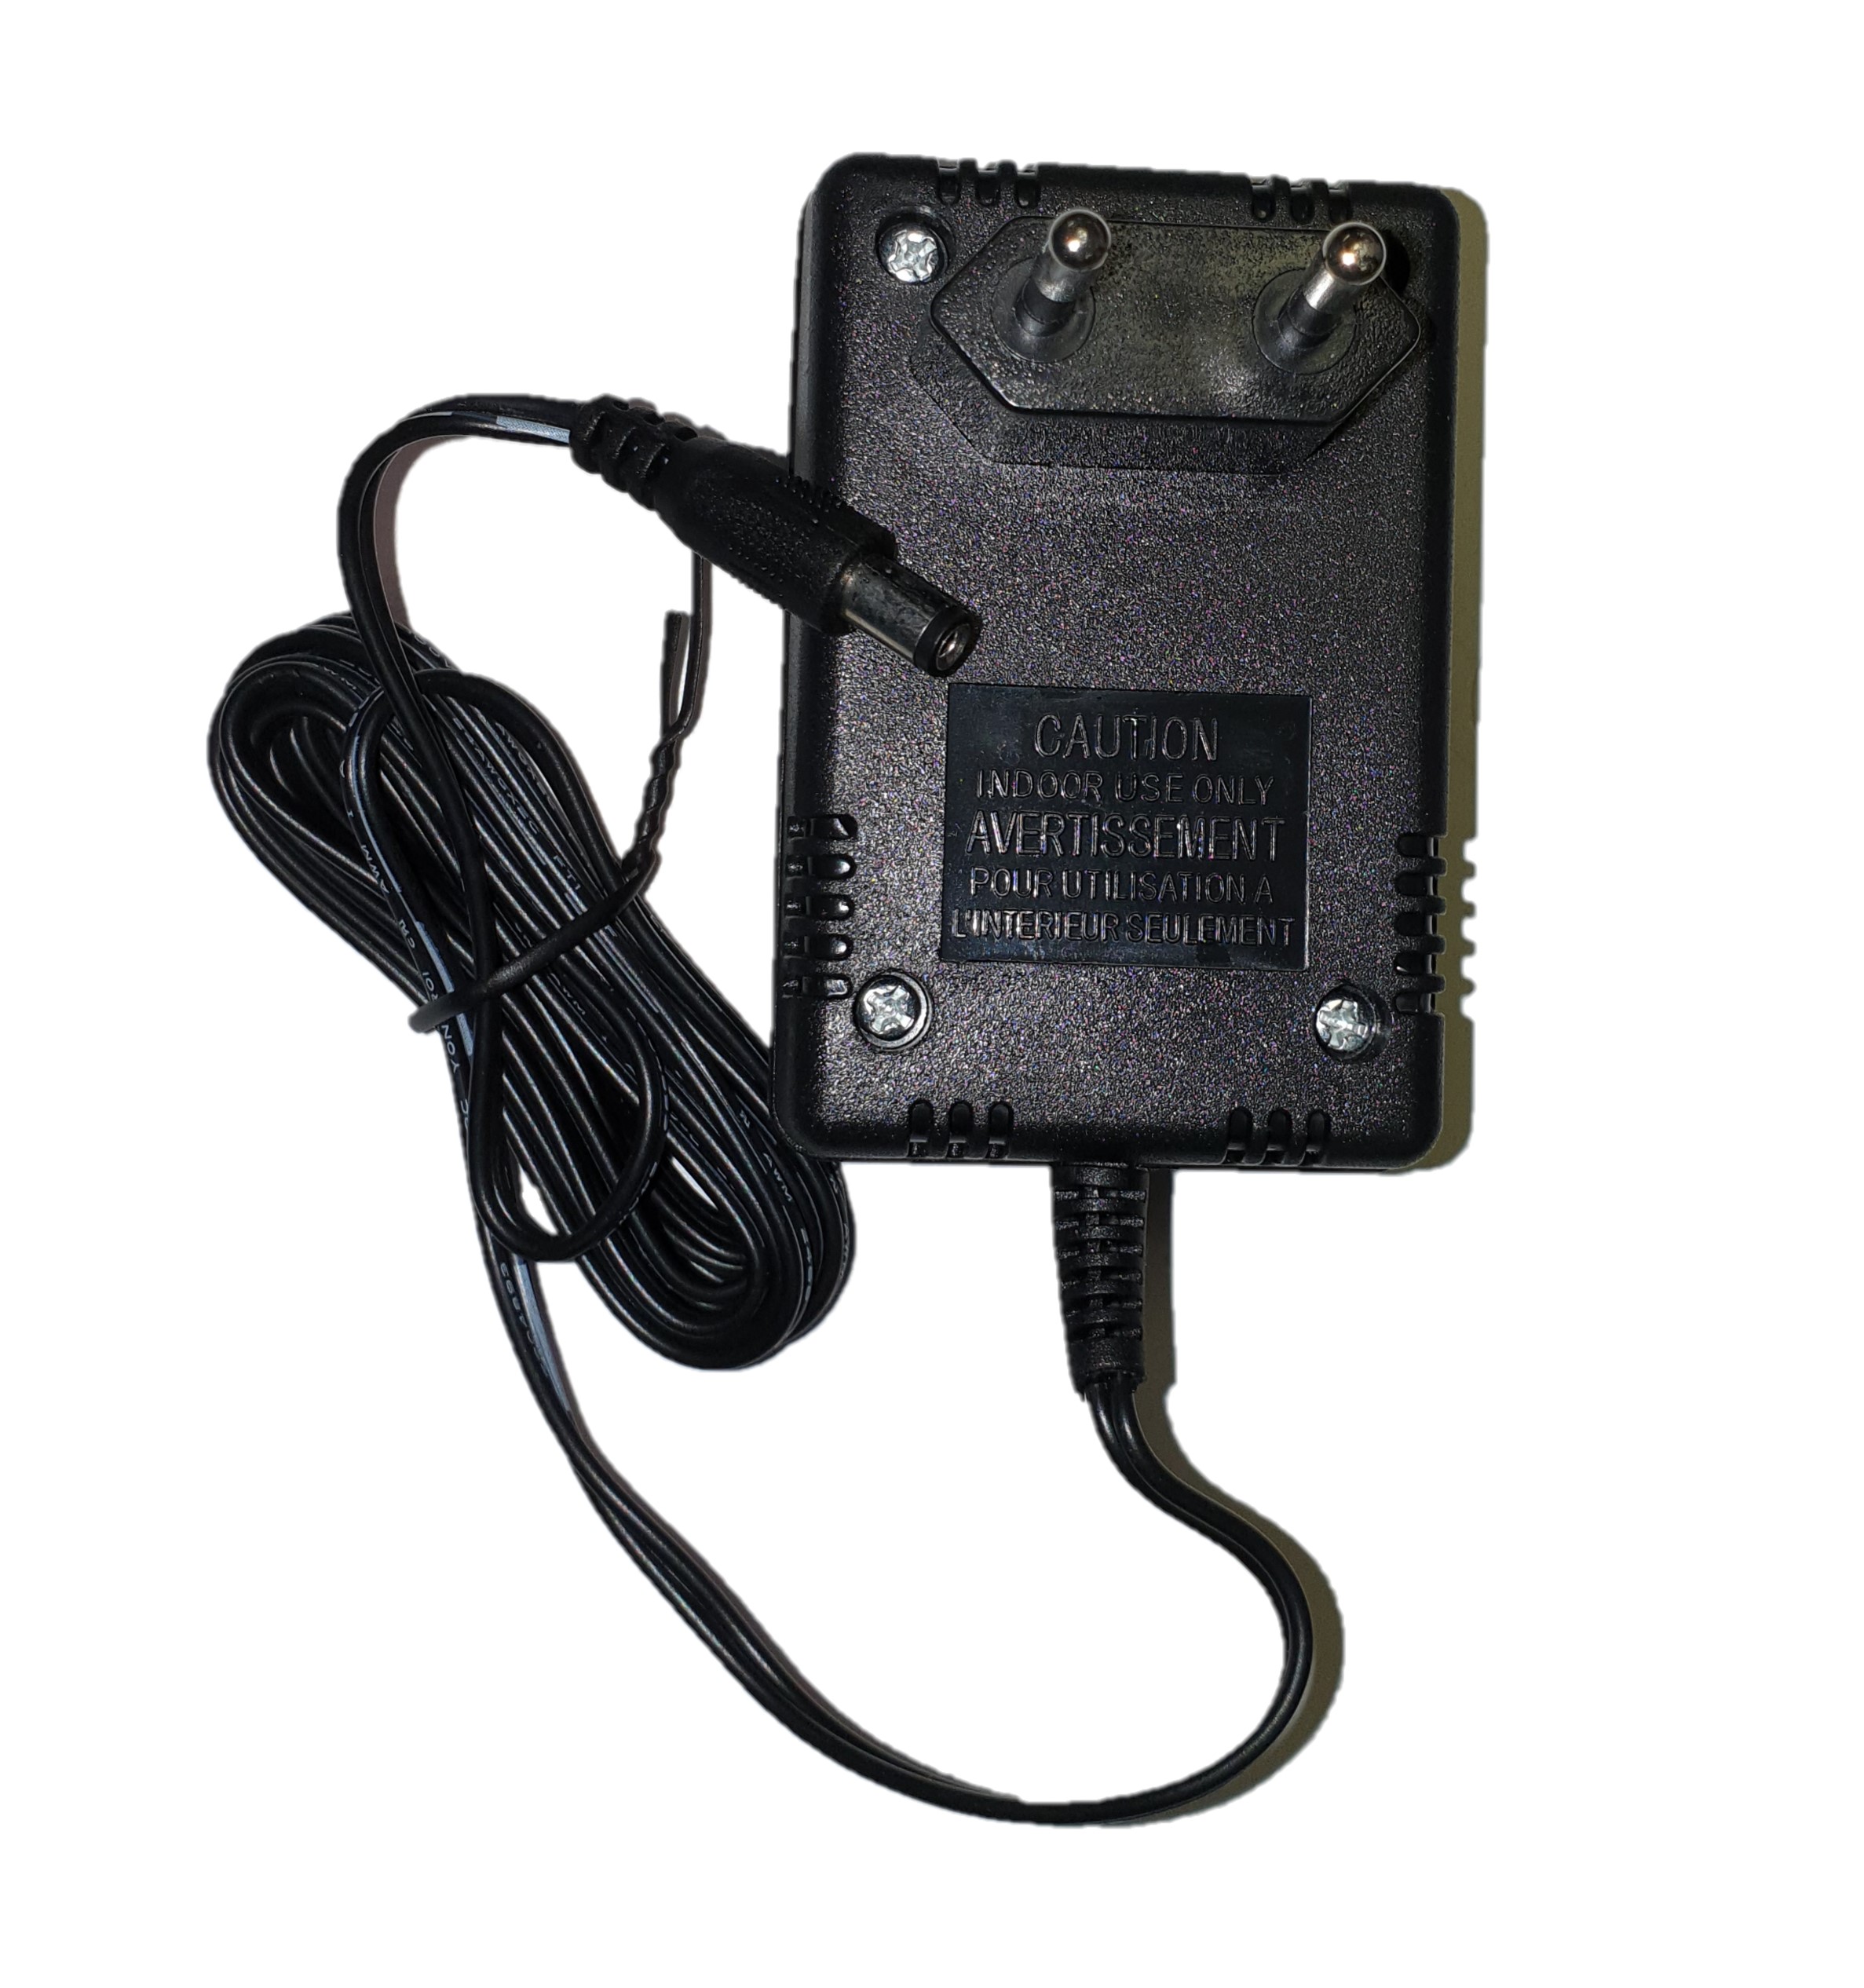 Reciver feed
The voice kit includes the whitecap and Vumeter application.

Installation
STEP 1: Feed the reciver.
Connect the power supply to the receiver and plug it into the outlet
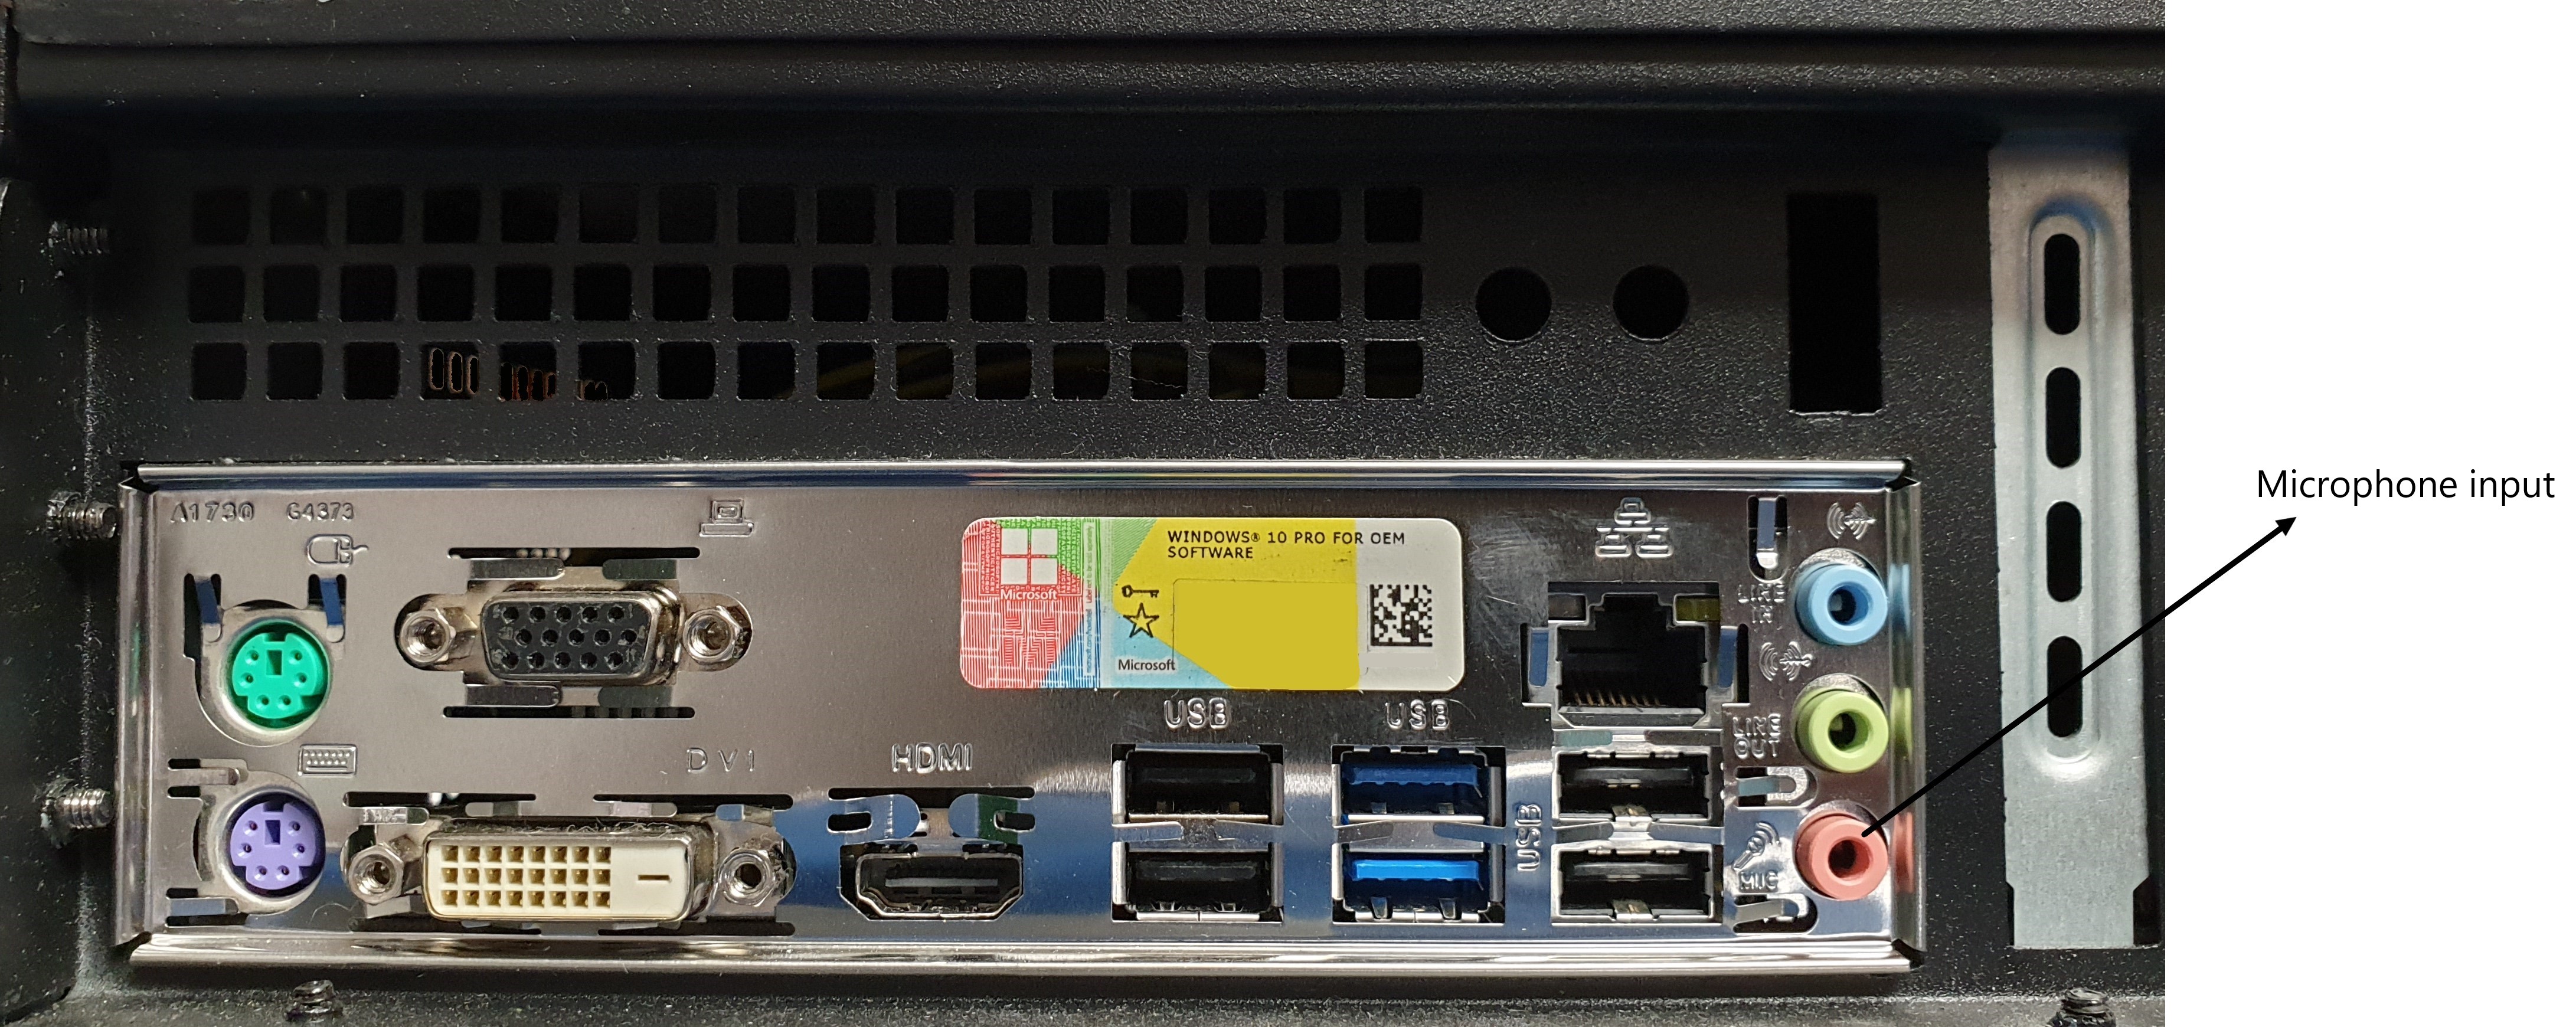
STEP 2: Connect the receiver to the PC.
Connect the jack cable between the receiver and the PC
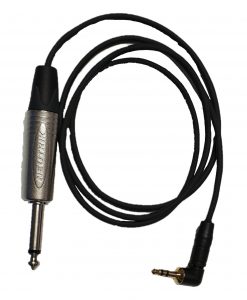
The fine connection must be connected to the microphone input of the PC:
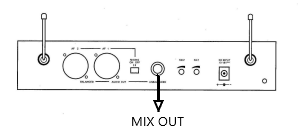
The thick connector must be connected to the receiver’s MIX OUT output:
STEP 3: Put batteries into the microphones.
Put the batteries to the microphones and put them in ON position
STEP 4: Configure the computer for proper operation.
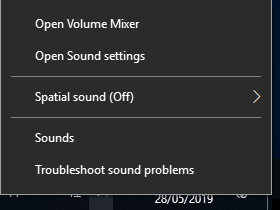
1- Right click on the speaker icon in the taskbar (if the icon does not appear, it may be found by pressing the little arrow up)
![]()
2- Open the sound configuration
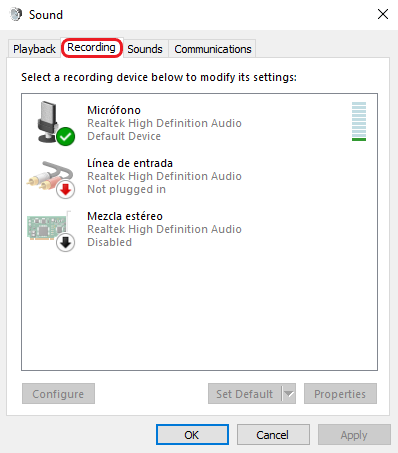
3- Access the “Recording” tab, and double click on the “Microphone” device
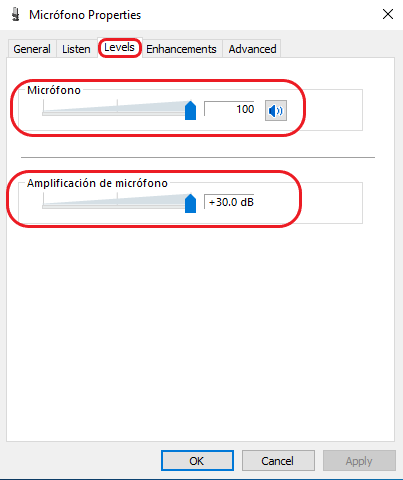
4- Access the “Levels” tab, modify all levels to be the same as the following image
Startup
- Check that the receiver is connected to the power and the switch (1) is in the I (on) position. The power LED “Power” (2) must be lit.
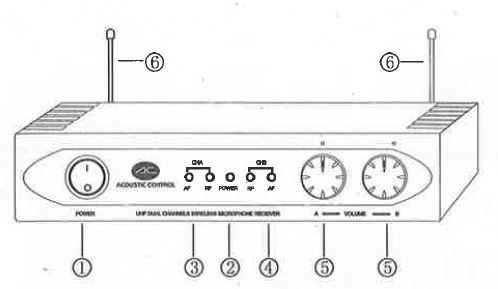
2. Make sure that the antennas (6) are properly fixed and check that they do not touch any metal part.
3. Verify that the two volume adjustment levels (5) have the appropriate value (in case of doubt, raise them to the maximum level).
If you are going to use the hand microphone:
1º Verify that the micron has the batteries mounted.
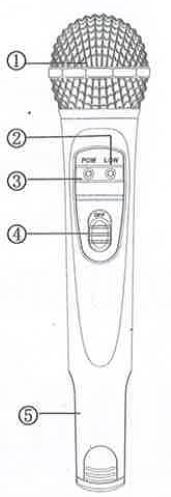
2º Put the power switch (4) in the ON position. The power LED (3) must be on.
Remember to turn off the microphone if you are not going to use it for a while.
If you are going to use the headset microphone:
1º Verify that the transmitter has the batteries installed.
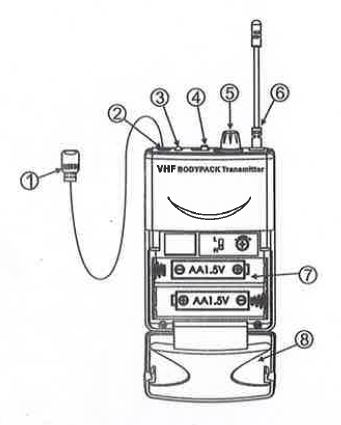
2º Connect the headset microphone to the connector (2) of the transmitter.
3º Turn the power switch (4) to the ON position.
4º Adjust the volume level (5) to the appropriate value.
How to use
To create scenes and actions to control a SHX device with the voice:
In edit mode (F11):
1- Double-click on the cell
2- Choose the lighting action
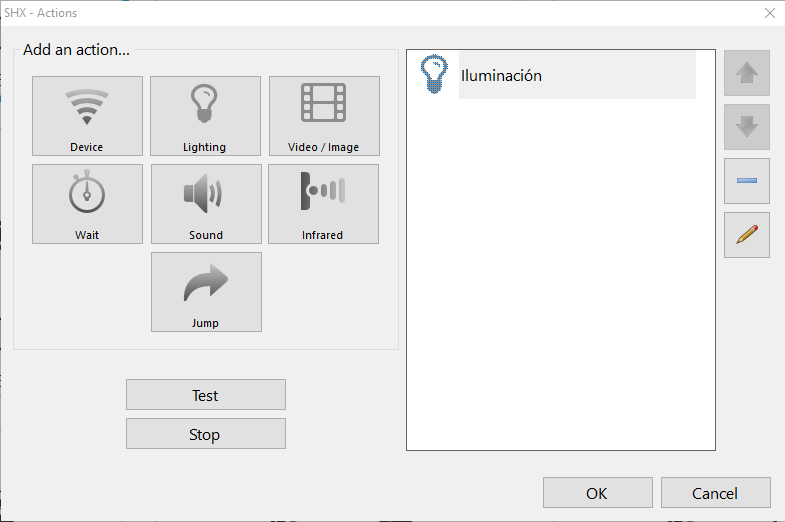
3- Choose the device you want to control from the devices list
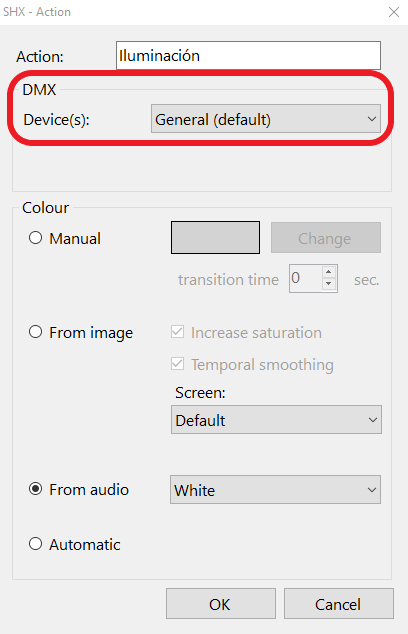
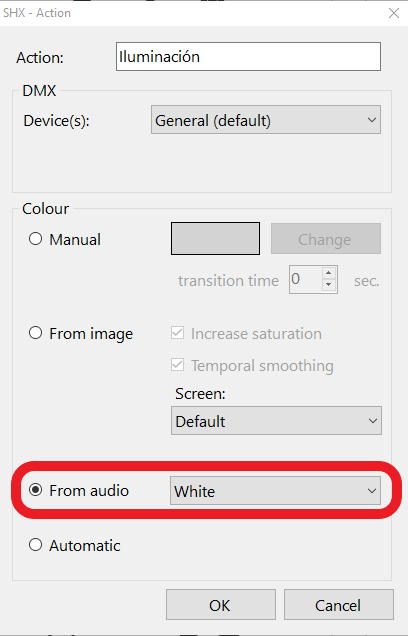
4- Choose the “From audio” mode. The device will change the color depending on the volume of the sound, and there are 4 types
- White: the device lights up in varying intensities of white depending on the volume of the noise.
- VU Meter: the color will change from green to red depending on the volume of the noise.
- Peaks: the light shines white when the noise goes above a certain level.
- Random: the color changes randomly when the noise exceeds a certain volume.
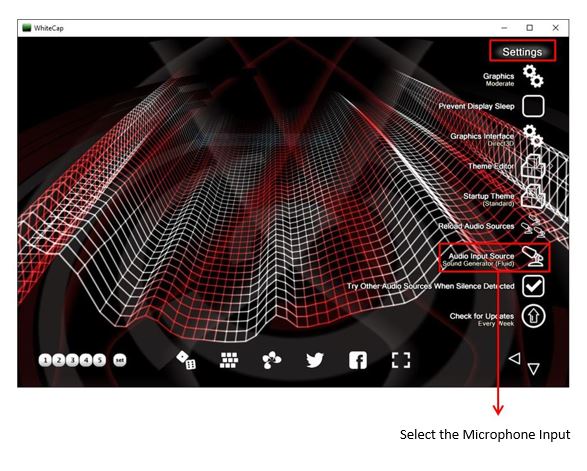
Operation of the voice kit with the Whitecap program:
A program called Whitecap is pre-installed with the Voice Kit. This program allows you to visualize the sound, in the form of dynamic, mesh backgrounds and with vivid and dynamic colors. WhiteCap is a sleek and sophisticated music visualizer and screensaver that features futuristic, wireframe mesh visuals with dynamic backgrounds and colors.
WhiteCap contains thousands of visual combinations, real-time audio response, configurable on-screen menus, and an extensive library of visual content.
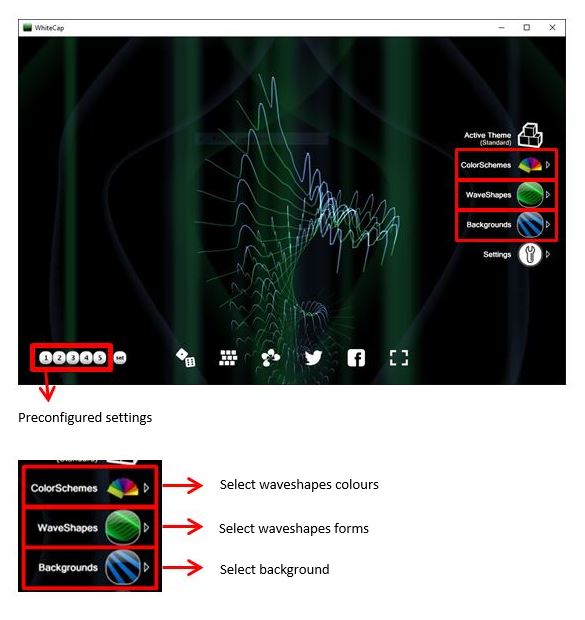
From the main window, configure the shapes, colors and backgrounds to customize the animation that will change with the sound:
If you wish, you can record and use the predefined settings:
Troubleshooting
There’s not sound from he microphone:
- Follow the instructions in the “Assembly of the equipment” section of this manual to make sure that the connections are correct, that the receiver is powered and that the microphones have batteries.
- Follow the instructions in the “Commissioning” section of this manual to ensure that all devices are turned on and working.
- Check if when speaking into the microphone the corresponding channel lights (3) and (4) on the front of the receiver light up:

In case they do not light try to increase the volume with the volume buttons (5) of the receiver.
4. Once you have checked the previous step, you can check if the computer is receiving a microphone signal from the Windows microphone configuration window. In this window, when speaking you have to appreciate how the microphone level bar illuminates.

In case it does not light up, check the settings in sections 1 and 2 of this guide.
5. Make sure you have the “Listen to this device” feature in the Windows microphone settings:
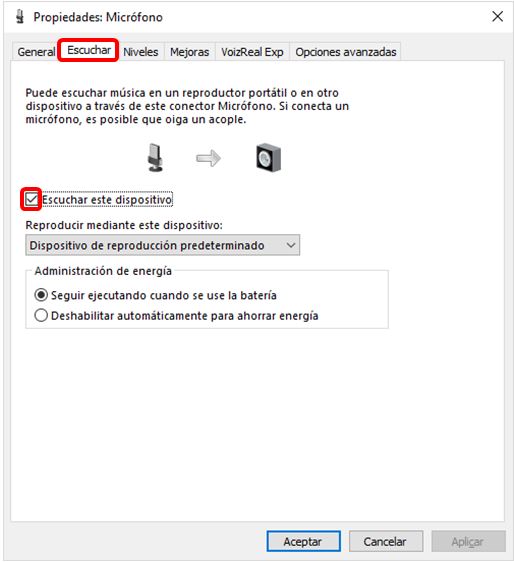
6. Check if the sound amplifier settings are appropriate. Follow the SHX Rack or SHX Compact sound troubleshooting guide that appears in the corresponding manual.
Recycling
Electrical products should not be disposed of with household waste.
- Dispose of the product at an electronic waste collection point or your specialist distributor.
- Place the packaging material in the cardboard, paper and plastic recycling bins.
Warranty
Within the legal warranty period we agree to rectify for free by repairing or replacing defects in the product derived from defective materials or manufacturing defects.
Any unauthorised alteration or modifications to the product will void this warranty.
Product conformity
This product complies with EU 2004/108/EC Directive requirements .
Declaration of conformity can be downloaded by clicking on the following link: bjliveat.com
Customer service
If you find any damage or any material is missing please contact our technical service for assistance.
Qinera
c/ Pacífic 51
08027 Barcelona, Spain
Phone: +34 93 285 04 37
Fax: +34 93 553 56 34
e-Mail: info@qinera.com
web: http://www.qinera.com
Any damage or breakage caused during transport must be notified within three days of receipt.


