
Description
Introduction
The fibre optic ceiling creates an amazing effect of shining stars. The stars change color randomly to create a magical effect that is ideal for working on color recognition and for activities that boost communication.
Supplied with a circle mounting board measuring 122 cm, a lightsource and fixing screws.
Our Luminea Sky can be used along with a 6 button, giant die, the switch that you want, or even with the Luminea App (available for downloading) to control the colours in a unique way.
Luminea Sky can also be part of the SHX System as part of a more complete multisensory environment, and offers unlimited control options using any of the SHX elements: choose any color or even change the color of the tube using your voice or depending on the color of the image being projected.
Product content:
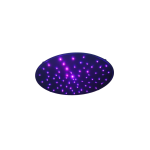
- Circular Luminea Sky (1)
- 4 x quick releasing mounting hooks, cables and anchors (2)
Light source (3) - Power supply for light source (4)
- 6m male-female DMX cable (5)
- Allen wrench for fiber assembly.
 SKY
SKY
Installation
Necessary elements for assembly:
For the assembly of the device you will need the following items (not included with the product):
- 4x fixing wall (6mm). Make sure that the plugs are suitable for the mounting surface.
- 4x screw.
- Attach the anchor socket base to the ceiling.
- Pass the steel cable through the inside of the socket.
- Screw the socket into the base.
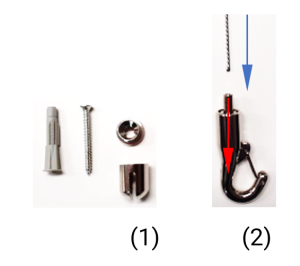
- Thread the steel cable through the carabiner retainer (1)
- To adjust the cable length, push inward on the cable retainer (2)
Assembly of the light source:
Necessary elements for assembly:
For the assembly of the light source you will need the following items (not included with the product):
- 2x fixing wall (6mm). Make sure that the plugs are suitable for the mounting surface.
- 2x screw.
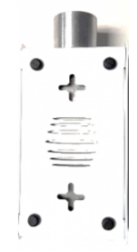
Attach the light source to the ceiling, in the central area of the Luminea Sky. Use the holes on the bottom to secure the light source:
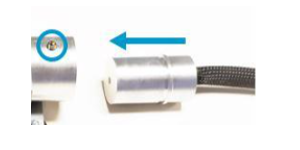
Insert the fibre bundle into the light source:
- In order to make use of the optical fibre, the connector of the fibre bundle must be inserted inside the receptacle of the light source until it comes to a stop, once it has been fixed with the screw and the key provided for this purpose.
Startup
- Feed the light source. On the one hand the feeder must be connected to the light source as shown in the figure and on the other side the feeder must be connected to the electric current.
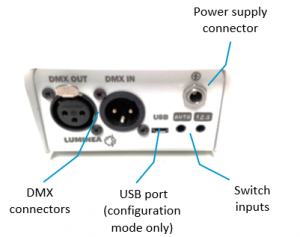
- Once you’ve plugged the light source, it will stay lit for 10 seconds (a white light) and thereafter it will work in automatic mode (see next section).
- For use with the SHX system, the DMX cable must be connected to the DMX IN connector. This cable must be connected to the rest of the DMX bus of the installation.
- In the event that this element is the last of the entire installation, the bus terminator should be connected to the DMX OUT (this terminator is supplied in the SHX Central Device).
- If you must continue the DMX signal to another device, you must connect the DMX cable to the DMX out connector.
How to use
Use with switches
 This input switches the device on and off. When it is switched on, the lighting will change automatically.
 This input changes the lighting colour cyclically, transitioning through red, green, yellow, blue, orange, white and off.
Use with wireless controllers
This device can be controlled with the wireless controllers Button 6, Button 1, Sensory Cube and Sensory Step.
Programme the wireless controller to work on the Sky (see the controller user guide) setting to change the colour of the lighting directly from this wireless controller.
You can also turn the device on and off from the wireless controller.
Control with an Android tablet
Use the Luminea app to control the Luminea Sly directly from an Android tablet.
Follow these steps:
Link the Luminea Sky to the tablet.
Select the lighting device from the list that appears in the app.
Use the activities and features in the app to control the lighting device.
Refer to the help section in the app for information on how to use it.
SHX use
- In the SHX software you can control the lights of the device.
- In the SHX app, you will also find a tab that allows you to change the colors of the device: you can choose between different colors or activate the function of automatic color changes.
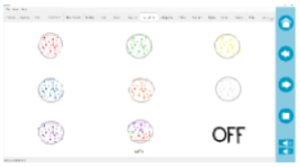
- In the SHX application there’s a power off button, you can turn off the device with it.
- You can configure the different contents of the SHX application as well, to create the effects you want to associate with that content. See the manual of the SHX application to learn how to create these contents, (automatic mode, according to the SHX scenes, by sound, simultaneous with the other elements or independent)
Software configuration
The control of this device has been added to the SHX application.
The configuration parameters for this device are:
Lighting control:
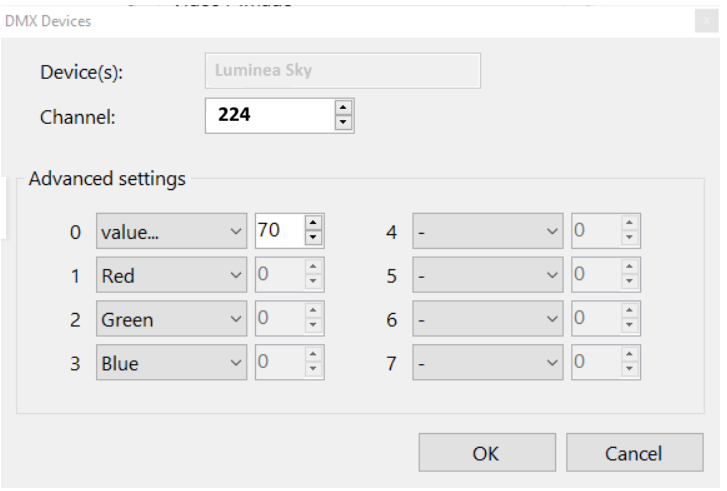
- DMX address: 224
In the SHX application it has been created within the DMX devices with the following configuration:
Troubleshooting
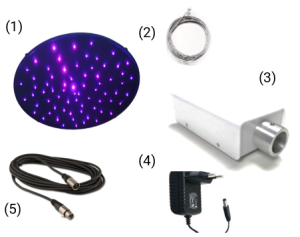
- For a basic troubleshooting of DMX devices follow the next steps:
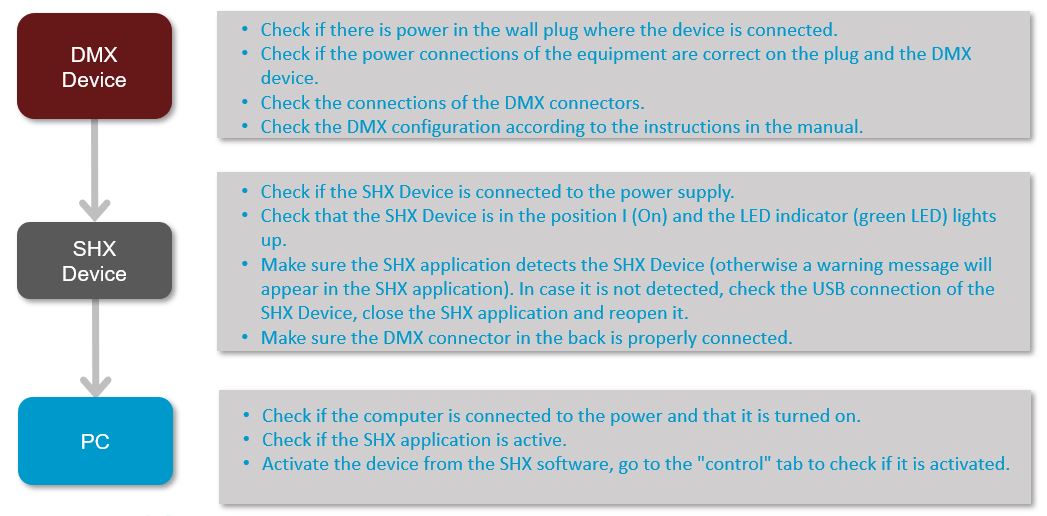
- When a DMX device is affecting the well functioning of other devices on the DMX bus, follow the next steps to identify wheater if a device is faulty or the issue is related to the cable used to connect all the devices.