
Equipment description
Introduction
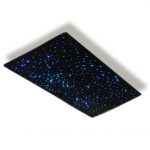
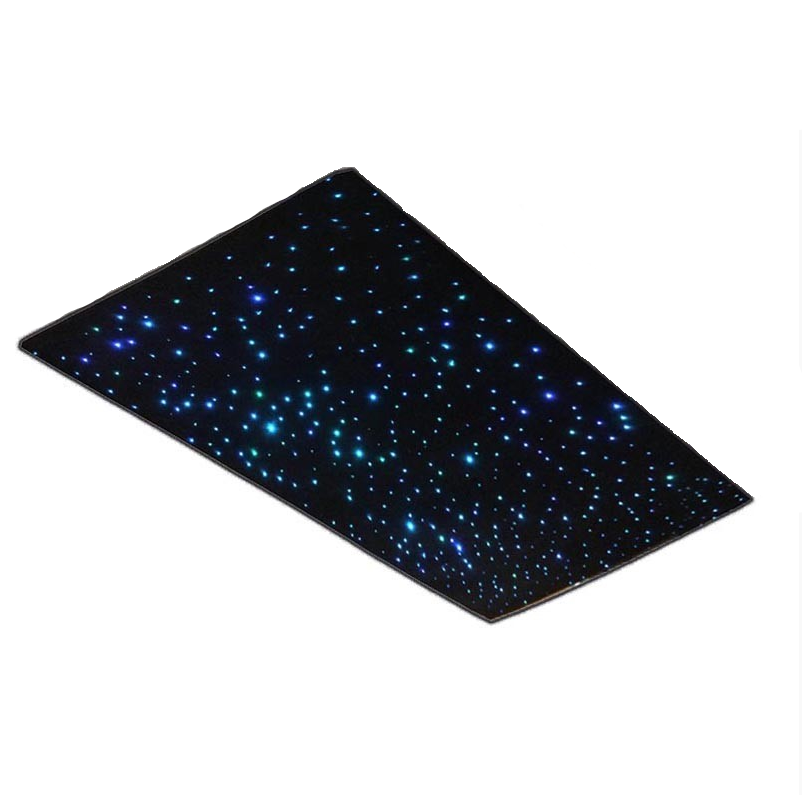
The fibre optic ceiling creates an amazing effect of shining stars. The stars change color randomly to create a magical effect that is ideal for working on color recognition and for activities that boost communication.
Supplied with a mounting board measuring 200 x 100 cm, a lightsource and fixing screws.
This star ceiling is the model used for rooms with the SHX System, and offers unlimited control options using any of the SHX elements: choose any color or even change the color of the tube using your voice or depending on the color of the image being projected.
Contents:
- Fibre optic ceiling carpet .
- Lightsource power supply
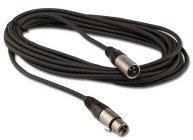
- 6m DMX cable male-female
1.  2.
2.  3.
3. 
Assembly of equipment
Fastening the panel to the ceiling:
Necessary elements for assembly:
For the assembly of the device you will need the following items not included with the product:
For fastening the curtain:
- 6x fixing block (min 8mm). Make sure that the plugs are suitable for the mounting surface.
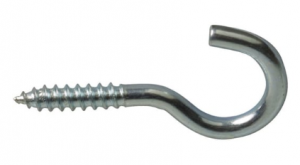
- 6x open eyebolts:
IMPORTANT: check if the surface where the product is to be fixed is safe and suitable
Hang the fiber ceiling
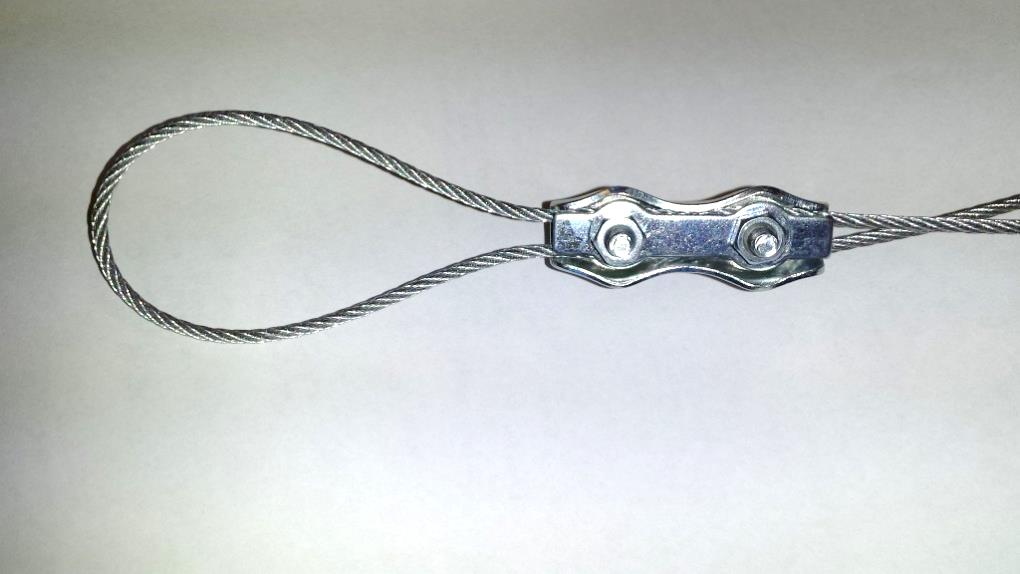
For fixing the roof, there are 6 adjustable steel cables. For the suspension of the panel, the anchor points must be marked on the roof of the room and the screws must be installed to hang the panel. Depending on the height of the roof, the length of the steel cable must be adjusted. Once adjusted, all the flange nuts should be tightened tightly.
IMPORTANT: the flanges are pre-assembled, but they are not fixed permanently. Before hanging the shower they should be tightened and make sure they are firmly attached.
Start up
The ceiling comes preconfigured to be controlled by the SHX system although it is possible to configure it for use in passive mode where the fiber changes color fusing the RGB colors with a smooth and slow transition.
Modo SHX
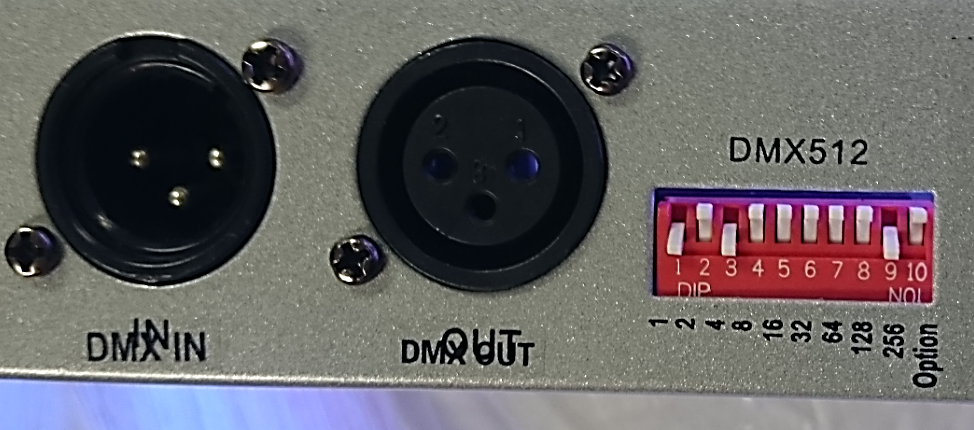
Make the DMX connections: for use with the SHX system, the DMX cable must be connected to the DMX IN connector. This cable must be connected to the rest of the DMX bus of the installation. In the event that this element is the last of the entire installation, the bus terminator should be connected to the DMX OUT (this terminator is supplied in the SHX Central Device). If you must continue the DMX signal to another device, you must connect the DMX cable to the DMX out connector.
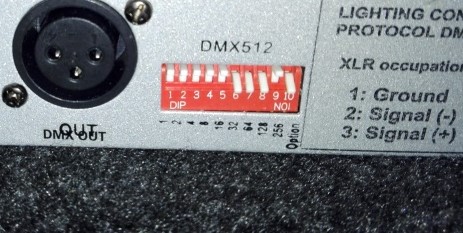
Likewise, the DMX address must be configured using the microswitches as shown in the figure (address 224):
Pasive Mode
For use in passive mode the microswitches must be configured as follows:
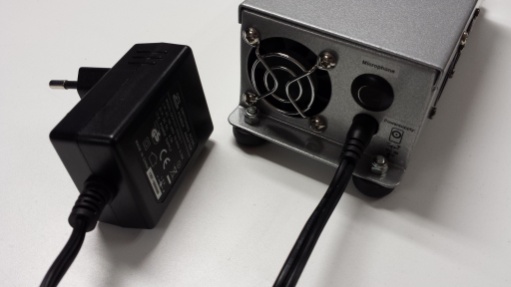
Plug th device
It must plug the light source. On the one hand the feeder must be connected to the light source as shown in the figure and on the other side the feeder must be connected to the electric current.
How to use
Before start using the device
Check the following points:
- The device must be connected to a wall plug.
- The DMX cable must be connected to the device.
- The SHX Central device must be switched on.
Use of the product
- In the SHX software you can control the lights of the device.
- In the SHX app, you will also find a tab that allows you to change the colors of the device: you can choose between different colors or activate the function of automatic color changes.
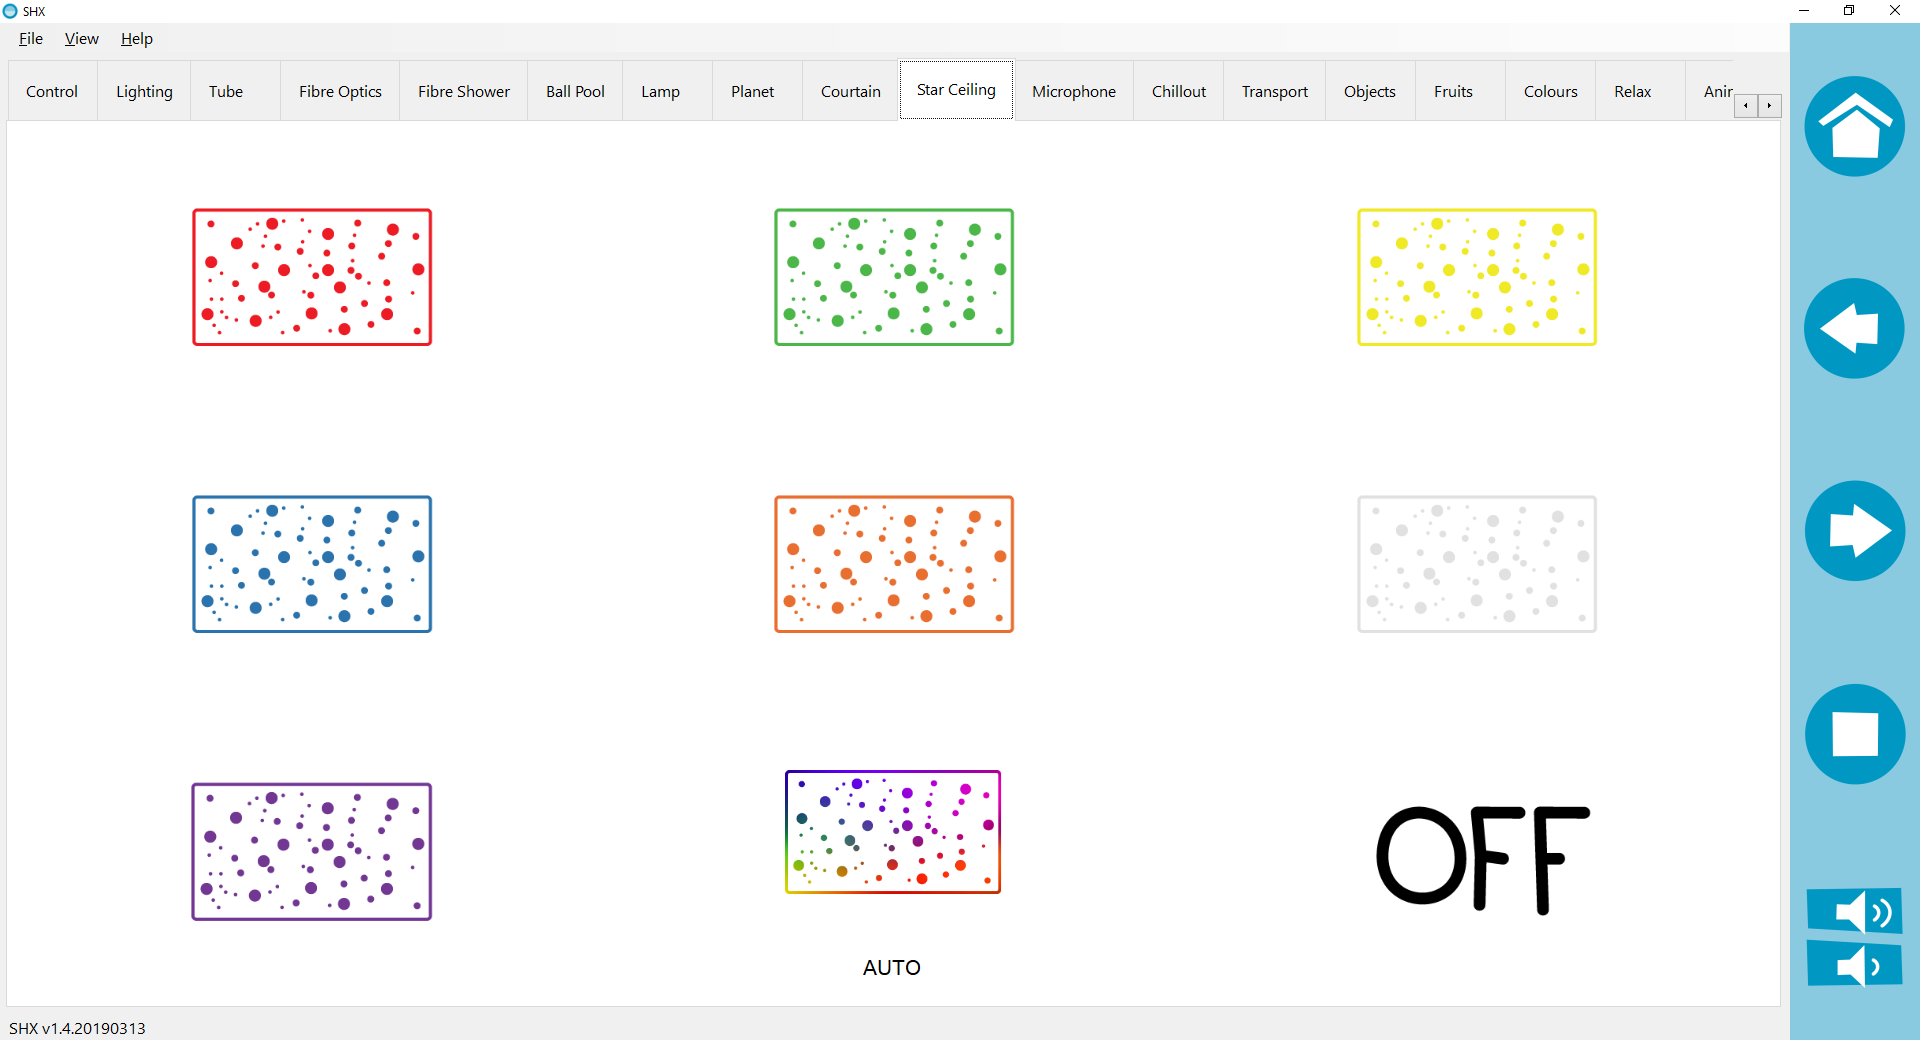
- In the SHX application there’s a power off button, you can turn off the device with it.
- You can configure the different contents of the SHX application as well, to create the effects you want to associate with that content. See the manual of the SHX application to learn how to create these contents, (automatic mode, according to the SHX scenes, by sound, simultaneous with the other elements or independent)
SHX software configuration
The control of this device has been added to the SHX application.
The configuration parameters for this device are:
Lighting control:
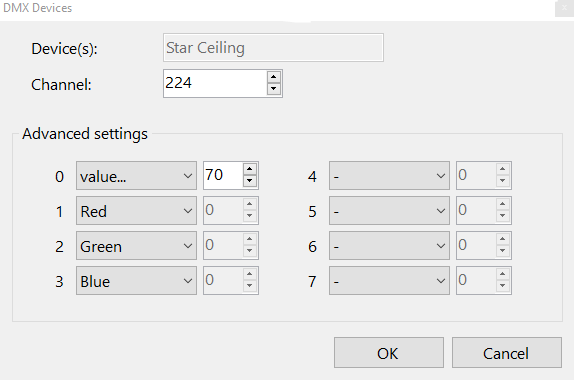
- DMX address: 224
In the SHX application it has been created within the DMX devices with the following configuration:
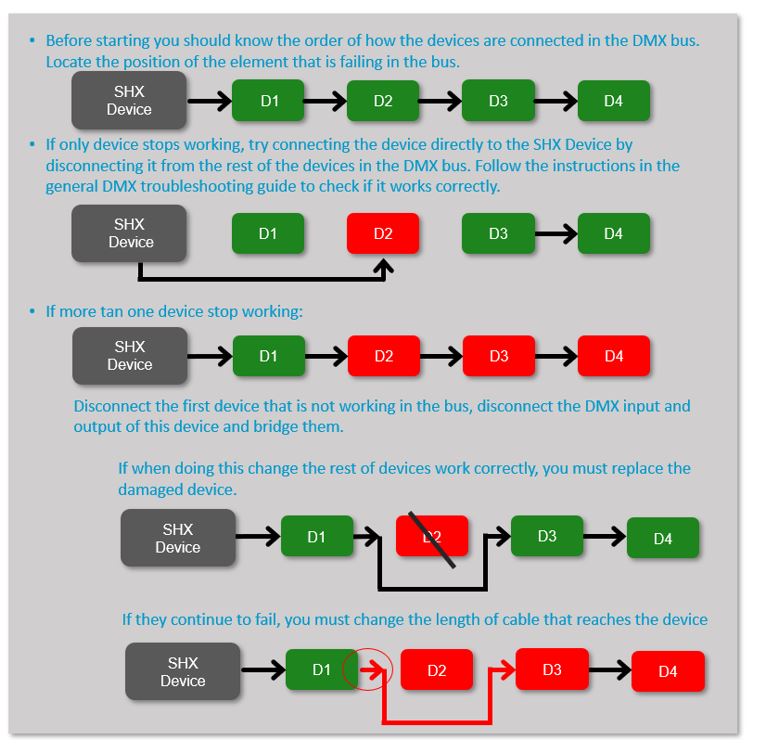
Troubleshooting
- For a basic troubleshooting of DMX devices follow the next steps:
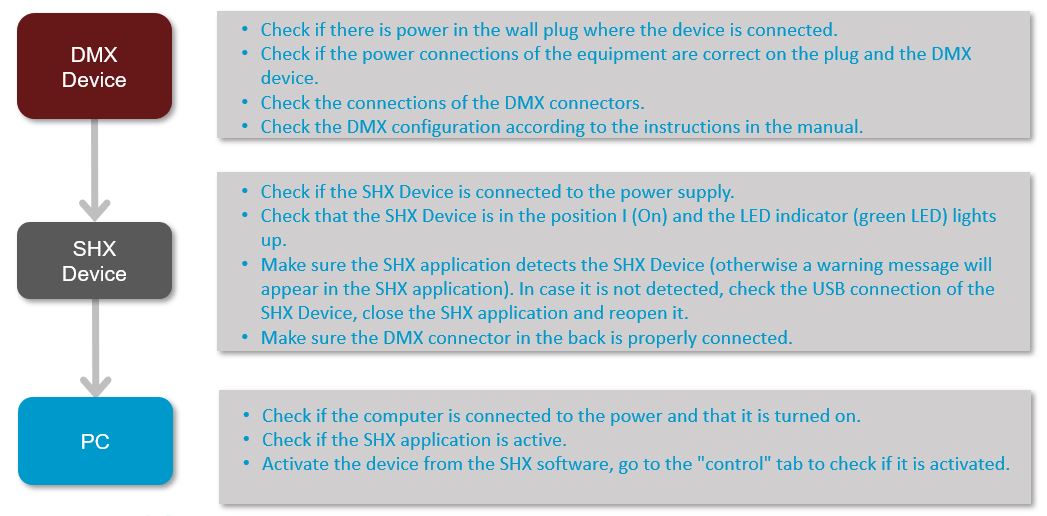
- When a DMX device is affecting the well functioning of other devices on the DMX bus, follow the next steps to identify wheater if a device is faulty or the issue is related to the cable used to connect all the devices.