
Startup
Before starting:
- Use only the feeder supplied with the equipment to power it.
- Connect the USB cables directly to the USB ports of the computer. Avoid using intermediate elements to connect them.
- Make sure that the switches you connect are not associated with any voltage source.
- Do not install the equipment inside metal cabinets, as they may reduce the coverage of radio frequency signals.
- When using infrared signal emission to control equipment, ensure that there is direct visibility between the SHX Central Device and the equipment to be controlled.
First steps:
Power supply
- Use only the feeder supplied with the equipment.
- Input voltage: 100V-240Vac 50-60Hz.
Supply voltage: 24Vdc / 5A - Do not use the power supply if you notice that the cables or the connector are in poor condition.
a) Power on:
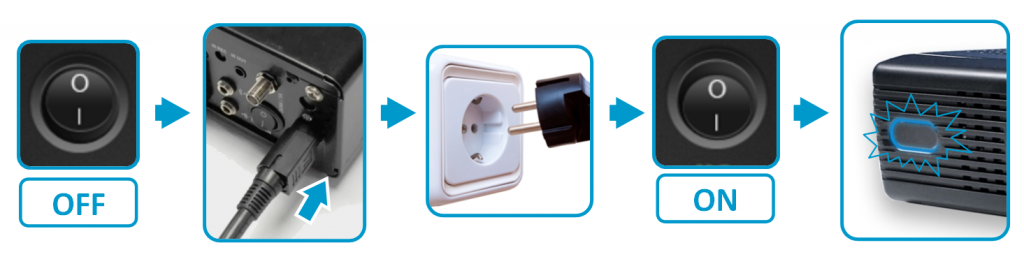
b) Power off
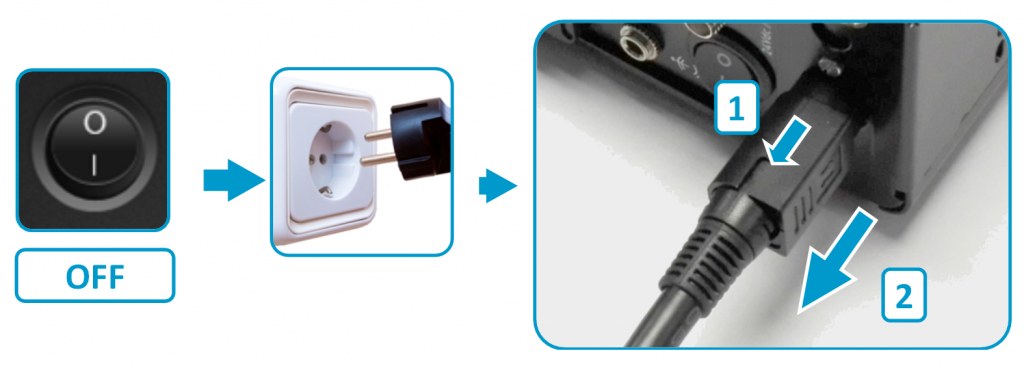
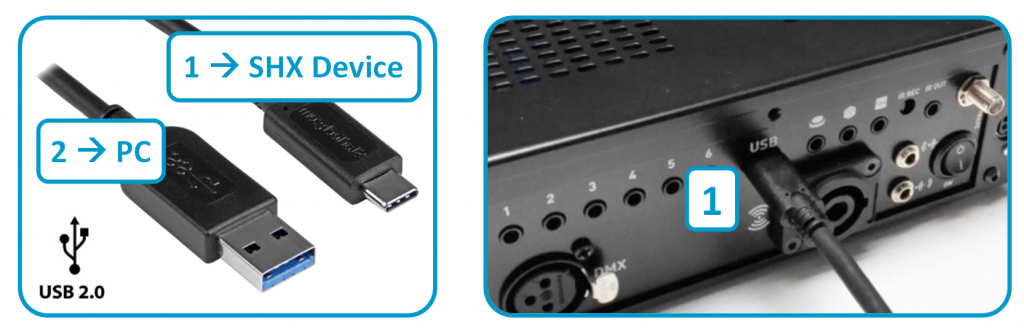
Connection to PC:
a) USB connection:
Connect the device to a computer using the supplied USB cable.
b) Installing SHX software on the PC:
Install on your computer the SHX.exe file found in the USB memory that has been supplied.
Copy the “BJCSHX” content folder that is also found in the USB memory to your computer.
IMPORTANT:
- The folder must be saved in C: \
- The device must be ON and connected to the computer using the USB cable before executing the SHX software.
Vibroacoustic elements:
The SHX Device vibration amplifier allows the connected elements to vibrate to the rhythm of the music, allowing users to feel the music in the body.
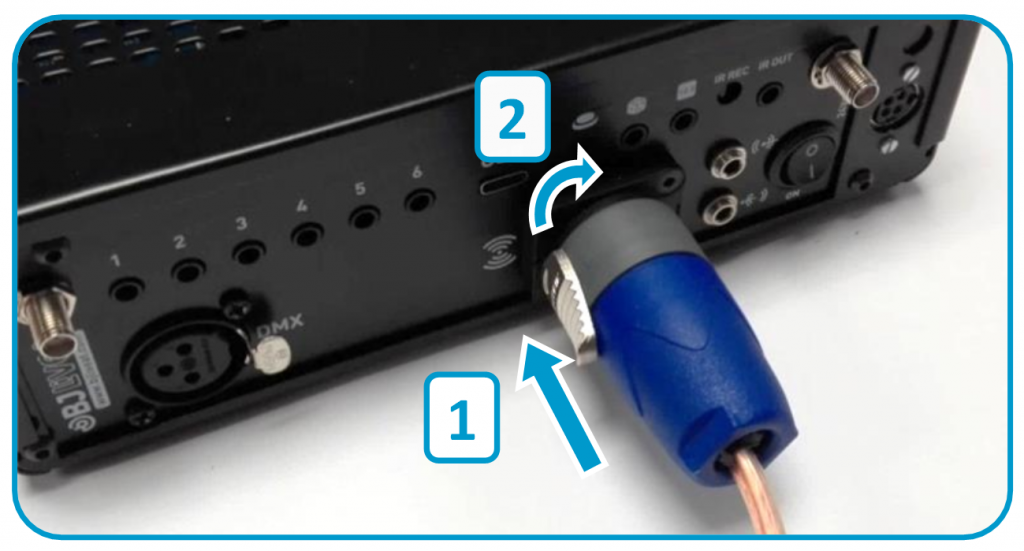
a) Vibroacoustic element connection:
IMPORTANT:
- Vibroacoustic element: Min 4 Ω / Max: 50w
- Do not connect audio speakers.
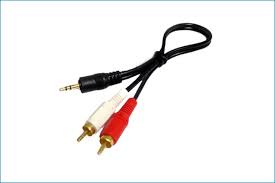
b) Audio signal connection:

** It is necessary to add a Jack – RCA cable
Not included
c) Functioning:
1- Start up the sound player (PC, MP4 …). Adjust the sound volume of the player so that the level is adequate.
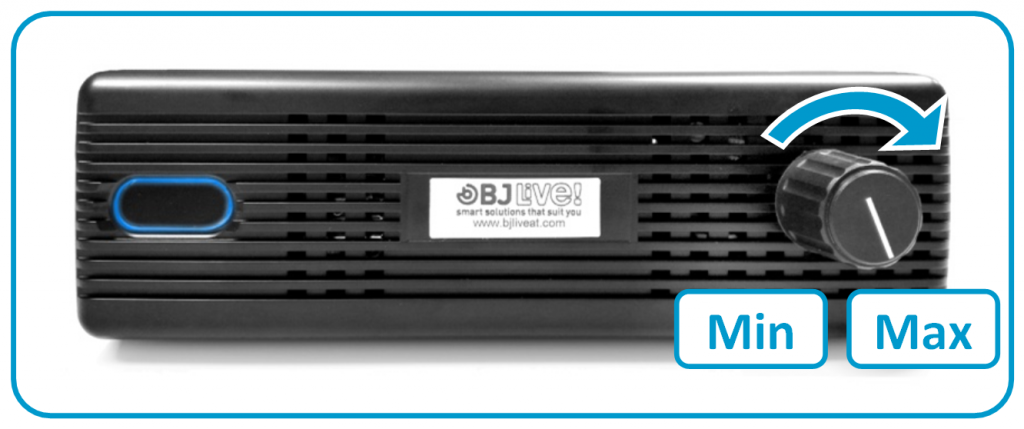
2- Adjust the vibration level from the SHX Device using the volume adjustment potentiometer.
Adjust only for vibration.
(The audio output signal is independent of this setting)
Lighting device control:
The SHX Device Lite allows the control of several independent lighting elements via DMX. This allows changing the colors and regulating the intensity of the lighting depending on the activity, according to the ambient sound or the projected images.
a) Connections:
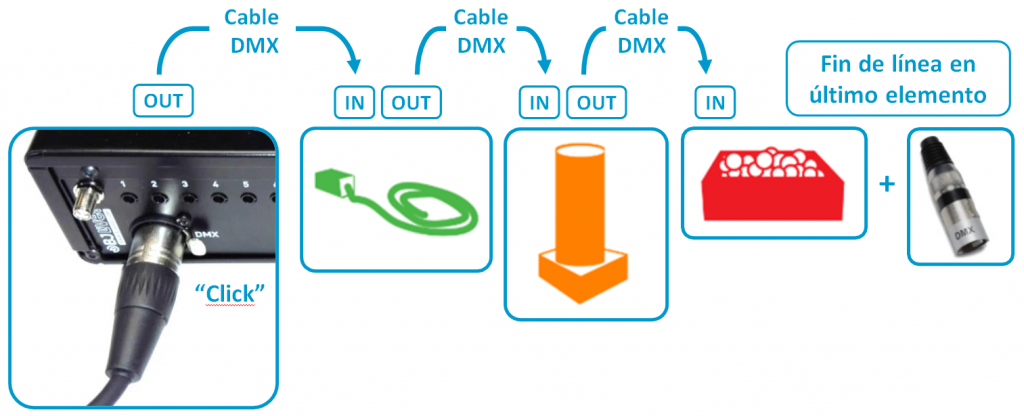
The lighting elements are controlled by DMX connections. It is necessary that the lighting elements have this type of connection.
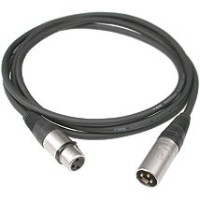
All lighting elements must be connected to each other, using DMX cables (included).
b) Functioning
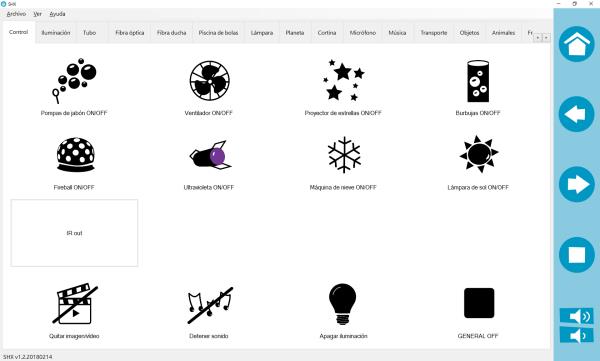
The elements are controlled from the “Control” tab icons.
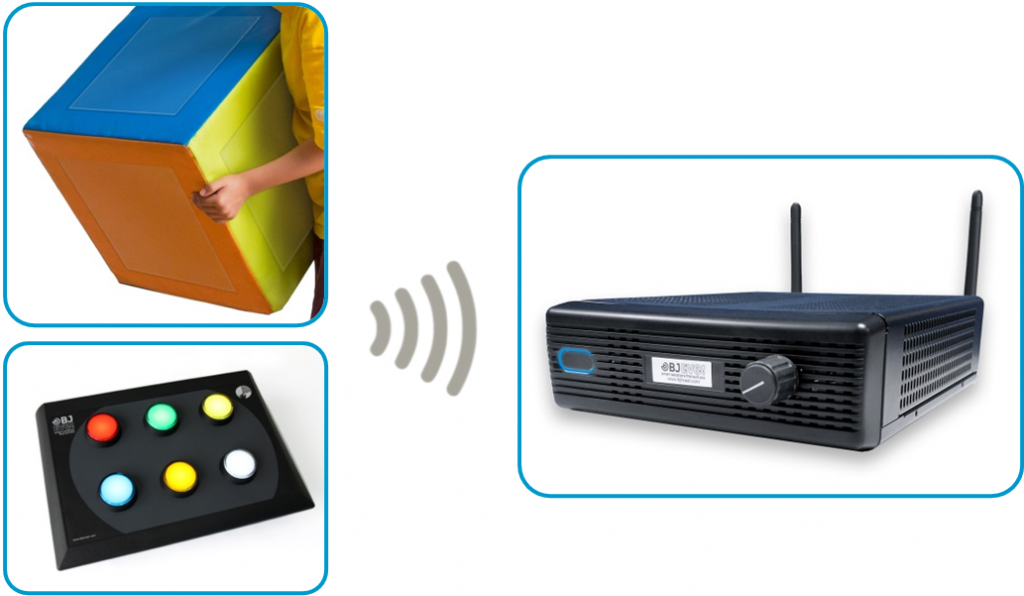
Access by wireless controls:
This device allows you to receive orders from different elements of the room to wirelessly activate the contents configured in the SHX software. For example: SHX Dice, Button 6, etc.
a) Connections
IMPORTANT:
Mount the antennas and make sure they are not close to sources of interference.
b) Functioning:
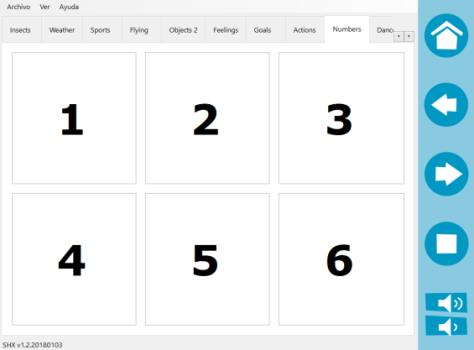
From the wireless elements you can activate the software boxes. Each button activates a box on the selected tab.
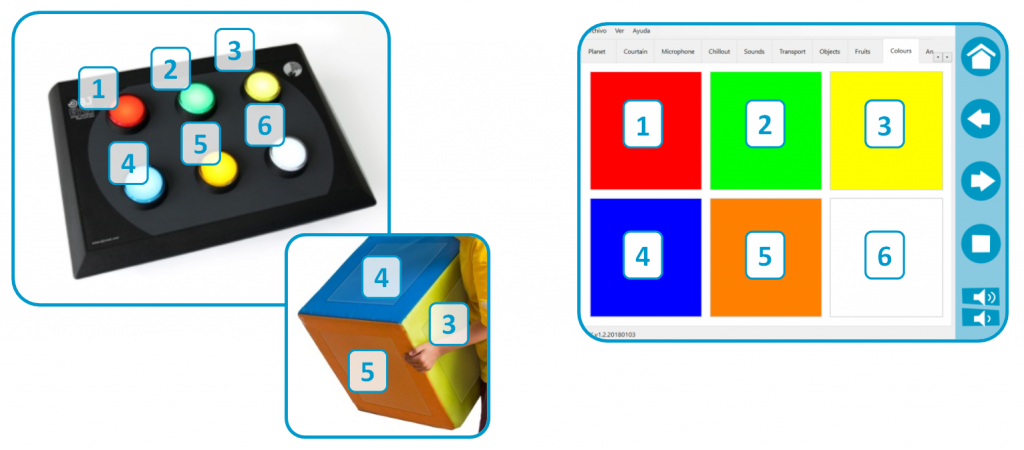
Switch access:
The contents of the SHX software can be activated using switches.
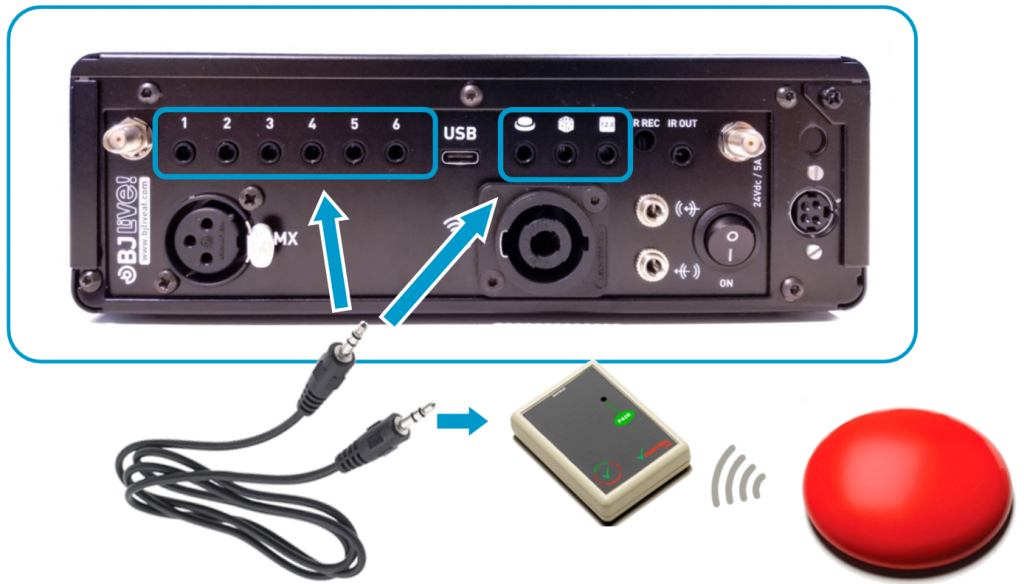
a) Connections:
Connect a switch (for ease of use we recommend that it be wireless) to the control inputs according to the desired function.
b) Functioning:
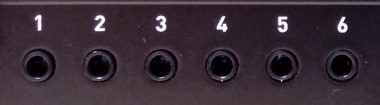
There are 6 direct inputs that activate the first 6 cells of each tab.
Inputs for specific functions

Scan: When activating this input, the scanning of the different cells of the active tab begins. A second activation will start the content of the selected cell.

Random: With each activation, a cell of the active tab is started randomly.

Sequential: With each activation of the input, the different cells of the active tab are organized in an orderly manner.
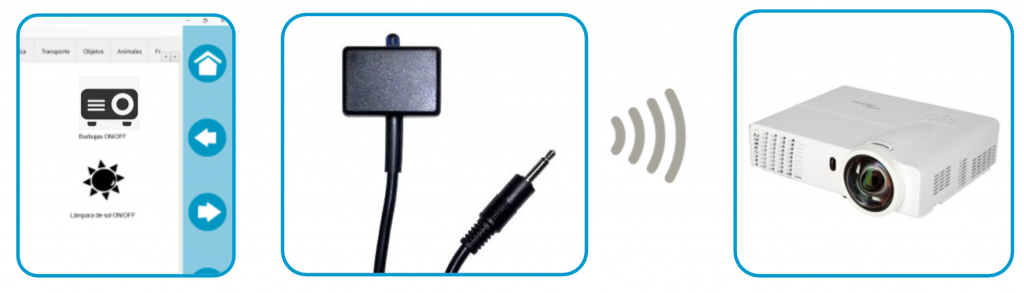
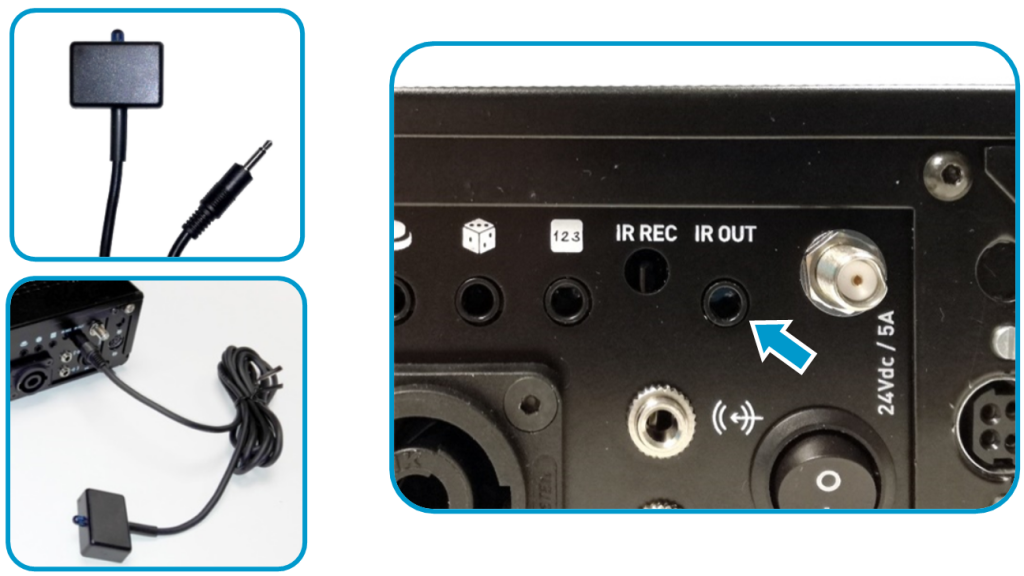
Infrared element control
From this device, you can control elements of the environment that already have remote controls, for example: Projector, TV. Using the SHX software you can memorize buttons of other remote controls to activate these elements from the SHX software.
a) Connections:
b) Functioning:
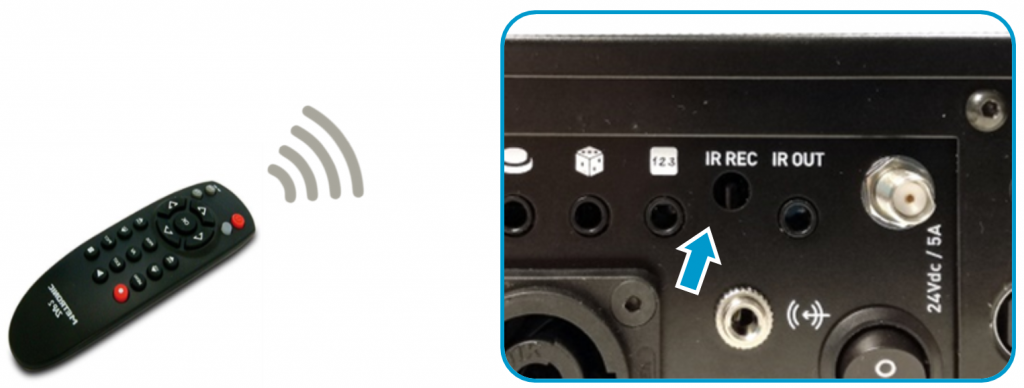
The SHX software allows to memorize the “IR function” of any command, facing the command towards the IR REC identifier.
Consult the SHX manual to integrate this function in a tab or scene.
Activating the programmed box will turn on the device that until now controlled the infrared control.